Overview
Are you feeling overwhelmed by rising energy bills? You’re not alone. Many homeowners share this concern, and it’s completely understandable. The good news is that transitioning to a DIY solar panel system can be a transformative solution, not just for your finances but also for the environment.
By planning carefully and gathering the necessary tools, you can take control of your energy costs and contribute to a more sustainable future. A solar energy system comprises several components, each playing a vital role in harnessing the sun’s power. Imagine the significant savings on your utility bills and the satisfaction of achieving energy independence!
Moreover, the ecological impact of switching to solar energy is profound. You have the power to reduce your carbon footprint and contribute to a healthier planet. Together, we can make a difference.
As you embark on this journey, remember that you’re not alone. We are here to support you every step of the way, ensuring you feel informed and prepared for your project. Let’s work towards a brighter, more sustainable future together!
Introduction
We understand that many homeowners are feeling the pressure of rising energy bills and are seeking ways to cut costs while also being environmentally conscious. Harnessing the sun’s energy has emerged as a promising solution for those looking to reduce their carbon footprint and achieve energy independence. A DIY solar panel system not only offers significant savings on energy bills—averaging $1,500 annually—but also empowers you to take control of your energy needs, contributing to a more sustainable future.
However, we recognize that the journey from concept to installation can be overwhelming, often raising questions about the best practices and essential steps involved. How can you navigate this process effectively and ensure you maximize your investment in solar energy?
Together, we can explore the supportive steps that will guide you towards a brighter, more sustainable future.
Understand Solar Energy Fundamentals
We understand that energy bills can be a significant concern for homeowners, often leading to feelings of frustration and helplessness. Solar power offers a nurturing solution, harnessed through a that converts sunlight into electricity. The basic principle behind this technology is the photovoltaic effect, where sunlight excites electrons in the energy cells, generating direct current (DC) electricity. This electricity is then transformed into alternating current (AC) by an inverter, making it usable for your home appliances.
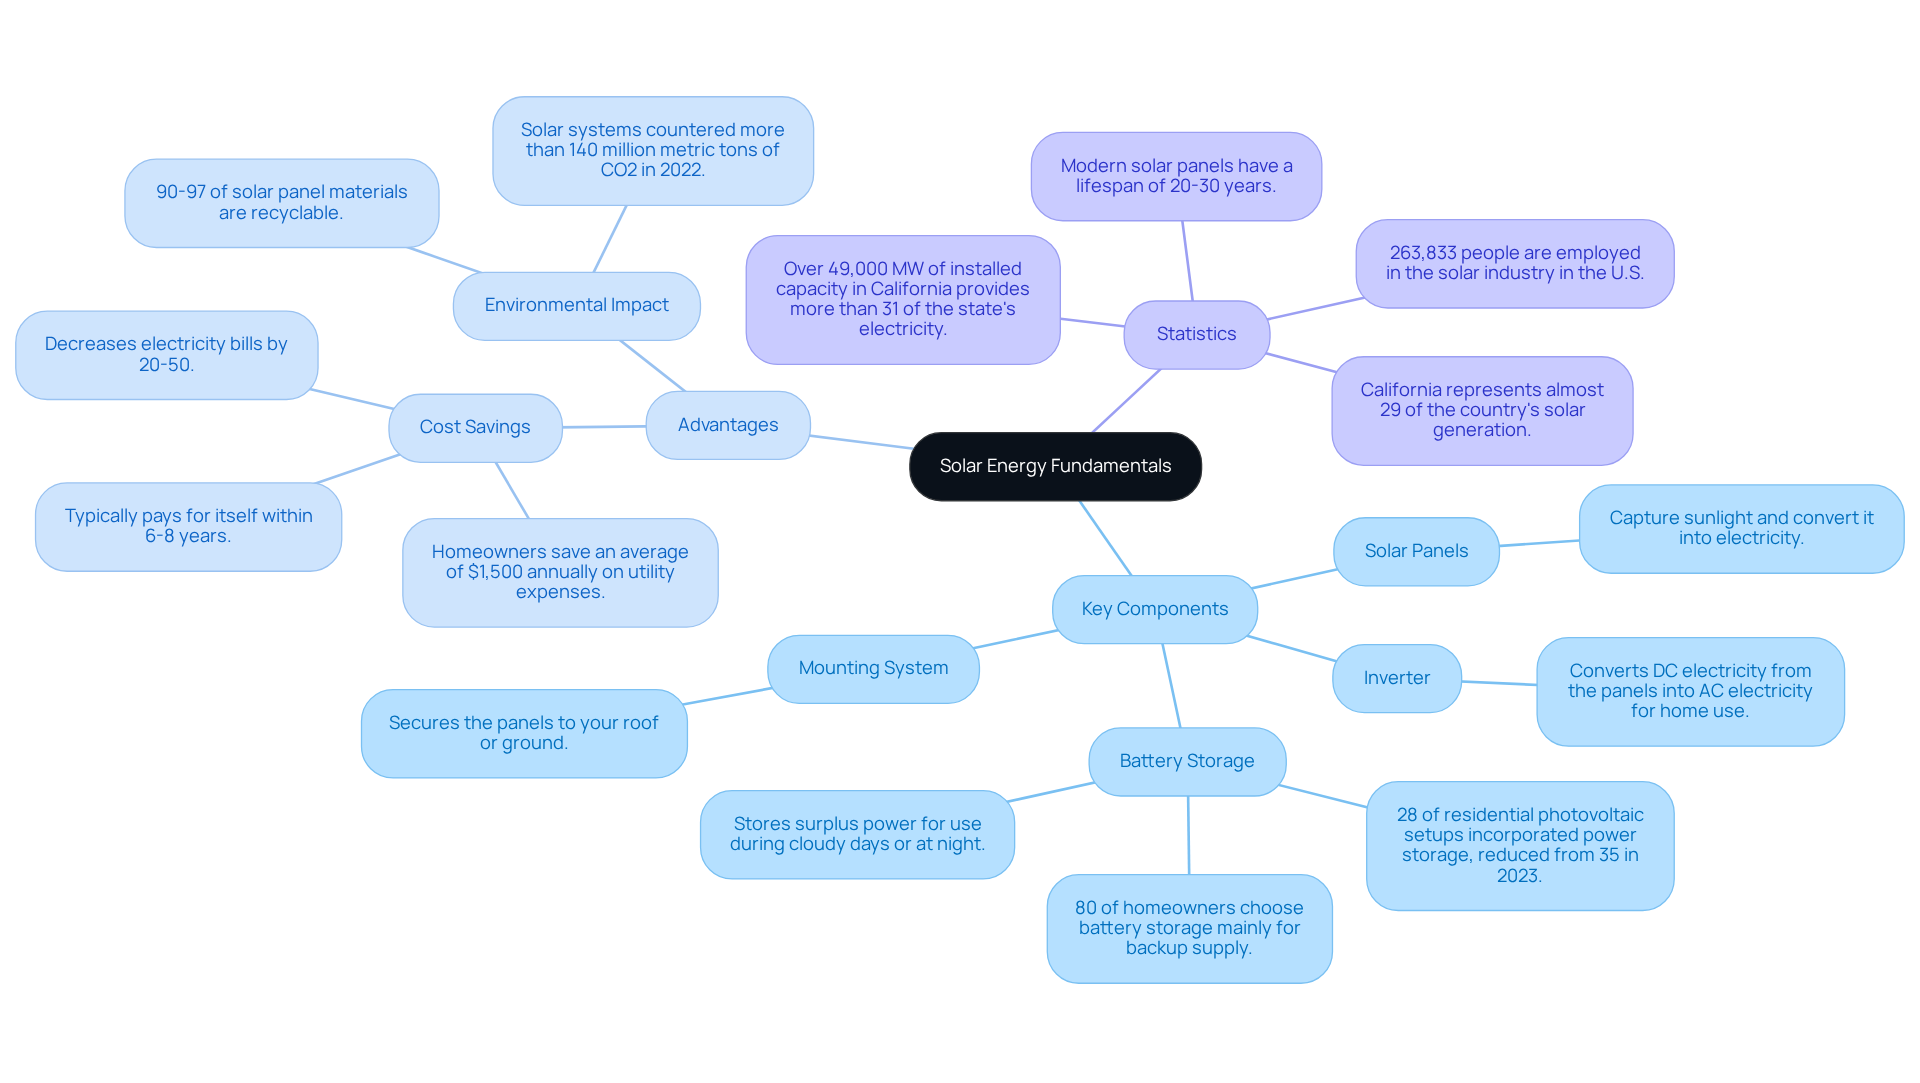
Key components of a solar energy system include:
- Solar Panels: Capture sunlight and convert it into electricity.
- Inverter: Converts DC electricity from the panels into AC electricity for home use.
- Battery Storage: Stores surplus power for use during cloudy days or at night, with 80% of homeowners choosing battery storage mainly for backup supply. Significantly, 28% of residential photovoltaic setups incorporated power storage, reduced from 35% in 2023.
- Mounting System: Secures the panels to your roof or ground.
The advantages of solar power are truly significant and can bring peace of mind. Homeowners can save an average of $1,500 annually on utility expenses, decreasing their electricity bills by 20-50%. Furthermore, a solar panel system DIY usually recoups its costs within 6-8 years, fostering a sense of independence in power supply while also helping to reduce your carbon footprint. In 2022, these systems countered more than 140 million metric tons of CO2, highlighting their positive ecological influence.
As you explore these options, it’s important to know that together we can make informed decisions about your energy system. California, leading the U.S. in renewable energy uptake, represents almost 29% of the country’s solar generation. It has the largest photovoltaic market in the U.S., with over 49,000 MW of installed capacity providing more than 31% of the state’s electricity. Let’s work towards a more sustainable future, ensuring that your energy needs are met with care and compassion.
Plan Your Solar Panel System
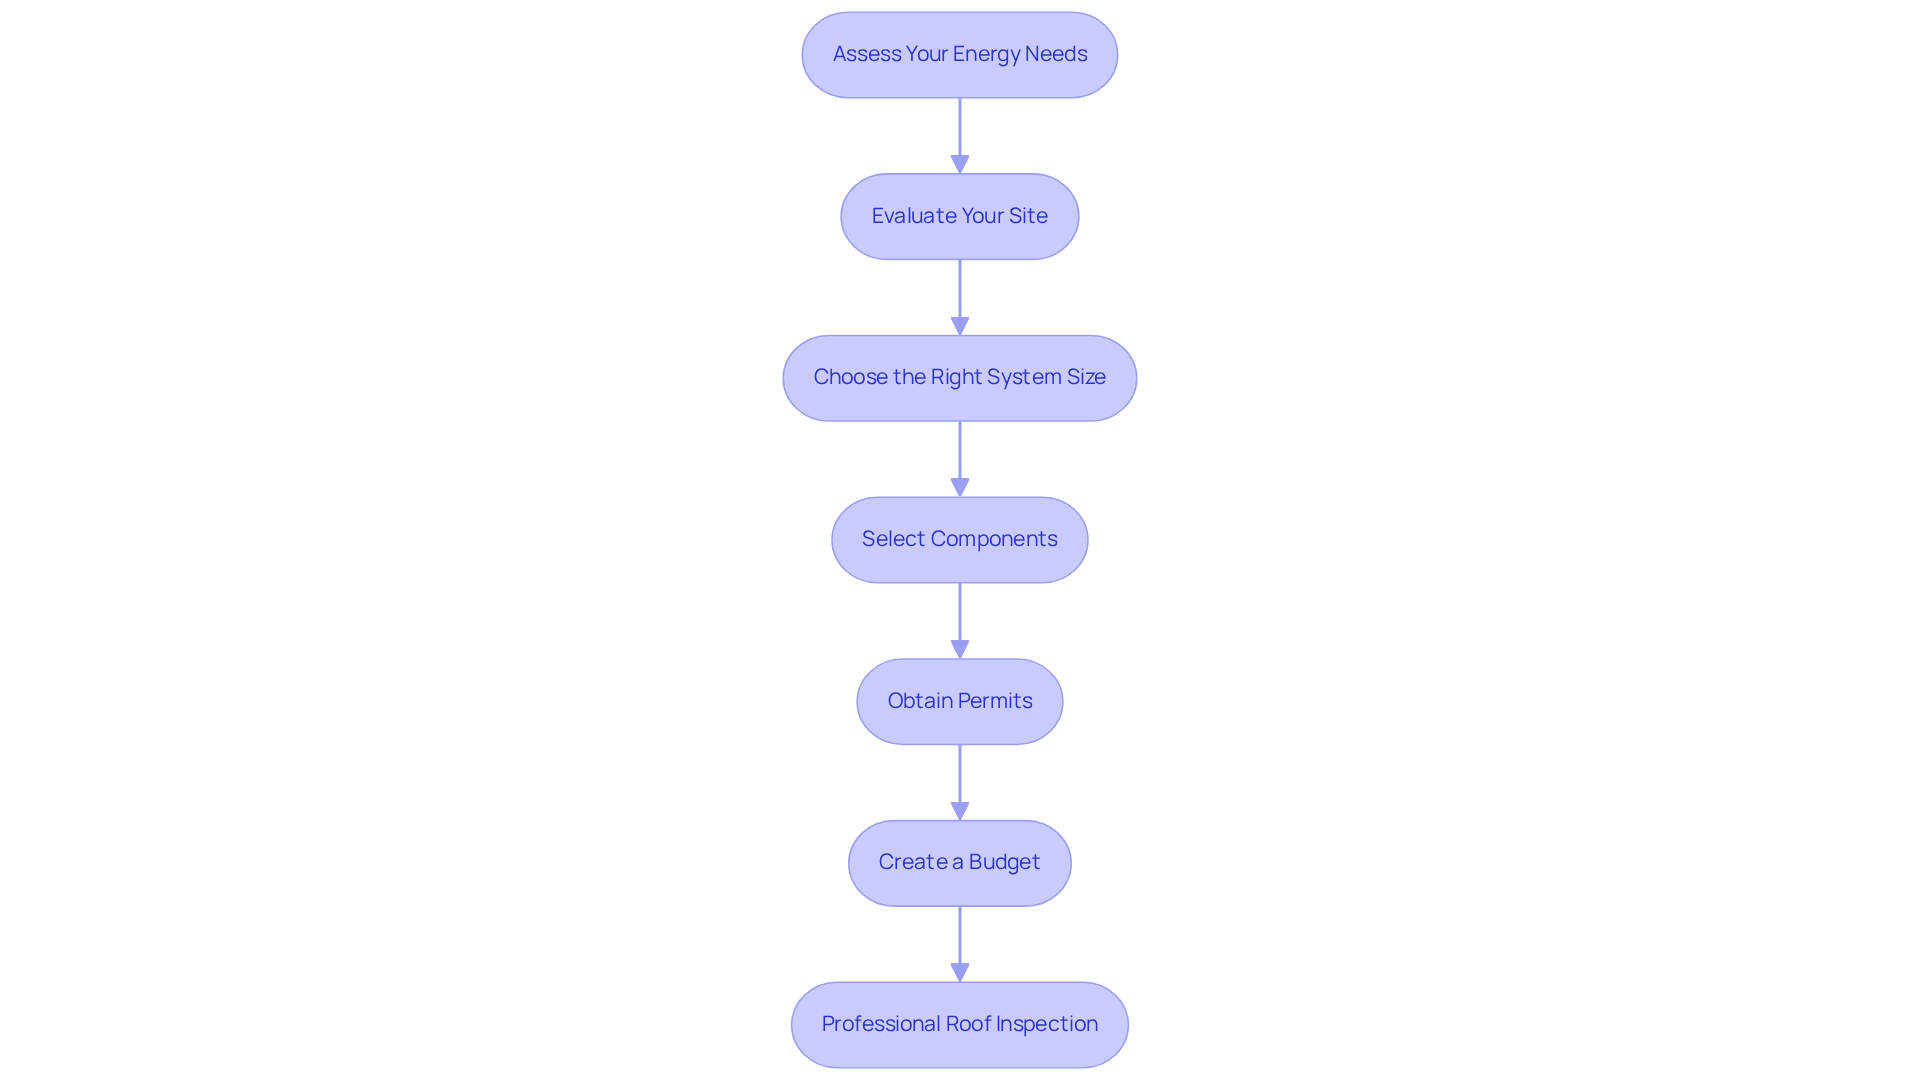
To effectively plan your solar panel system, let’s embark on this journey together by following these essential steps:
- Assess Your Energy Needs: We understand that reviewing your electricity bills can feel overwhelming, but it’s an important first step. By determining your average monthly usage in kilowatt-hours (kWh), you can gain clarity. For instance, a typical household consumes about 10,566 kWh annually, which translates to approximately 880 kWh per month. Understanding your will empower you to assess how much energy your power system needs to produce.
- Evaluate Your Site: Take a moment to check your roof’s orientation and angle. South-facing roofs with minimal shading are ideal for photovoltaic systems. Consider any potential barriers, like trees or structures, that may cast shadows on your devices, as shading can significantly diminish energy efficiency. It’s also important to note that roughly 50% of residences cannot support rooftop energy systems, so acknowledging this limitation during your evaluation is crucial.
- Choose the Right System Size: Using your energy needs assessment, calculate the size of the energy system required. A general guideline is that 1 kW of photovoltaic modules generates approximately 1,200 kWh annually. For example, a residence with an estimated yearly usage of 12,800 kWh would need around 25 photovoltaic units, assuming a production ratio of 1.6 and 320-watt devices.
- Select Components: Research and choose high-quality solar panels, inverters, and battery storage options. Look for products with good warranties and efficiency ratings, as these factors can impact the long-term performance of your system. Remember, investing in quality means investing in your future.
- Obtain Permits: We understand that navigating local regulations can be daunting, but securing necessary permits prior to setup is essential. This may include building permits and electrical permits, depending on your location. Ensuring adherence to local regulations is vital for a seamless setup process.
- Create a Budget: Estimating the total expense of your renewable energy setup can be challenging, but it’s an important step. Consider all aspects, including equipment, permits, and any professional assistance you may require. Setup expenses can increase by an extra $5,000 to $10,000, so don’t forget to take into account possible tax credits and incentives, such as the Residential Clean Energy Tax Credit, which can reduce up to 30% of setup costs. It’s worth noting that the typical residential electricity cost in California is 30 ¢/kWh, which is 52% greater than the national average of 20 ¢/kWh. This highlights the necessity of moving to renewable energy sources and the potential savings associated with it.
- Professional Roof Inspection: Before moving forward with the setup, we strongly advise carrying out a professional roof inspection to evaluate suitability. This step ensures that your roof can bear the load of the photovoltaic units and is in suitable shape for setup.
By carefully designing your energy system, you prepare for a successful setup that satisfies your energy requirements and optimizes your investment. Together, we can work towards a sustainable future that benefits both you and the environment.
Gather Necessary Tools and Materials
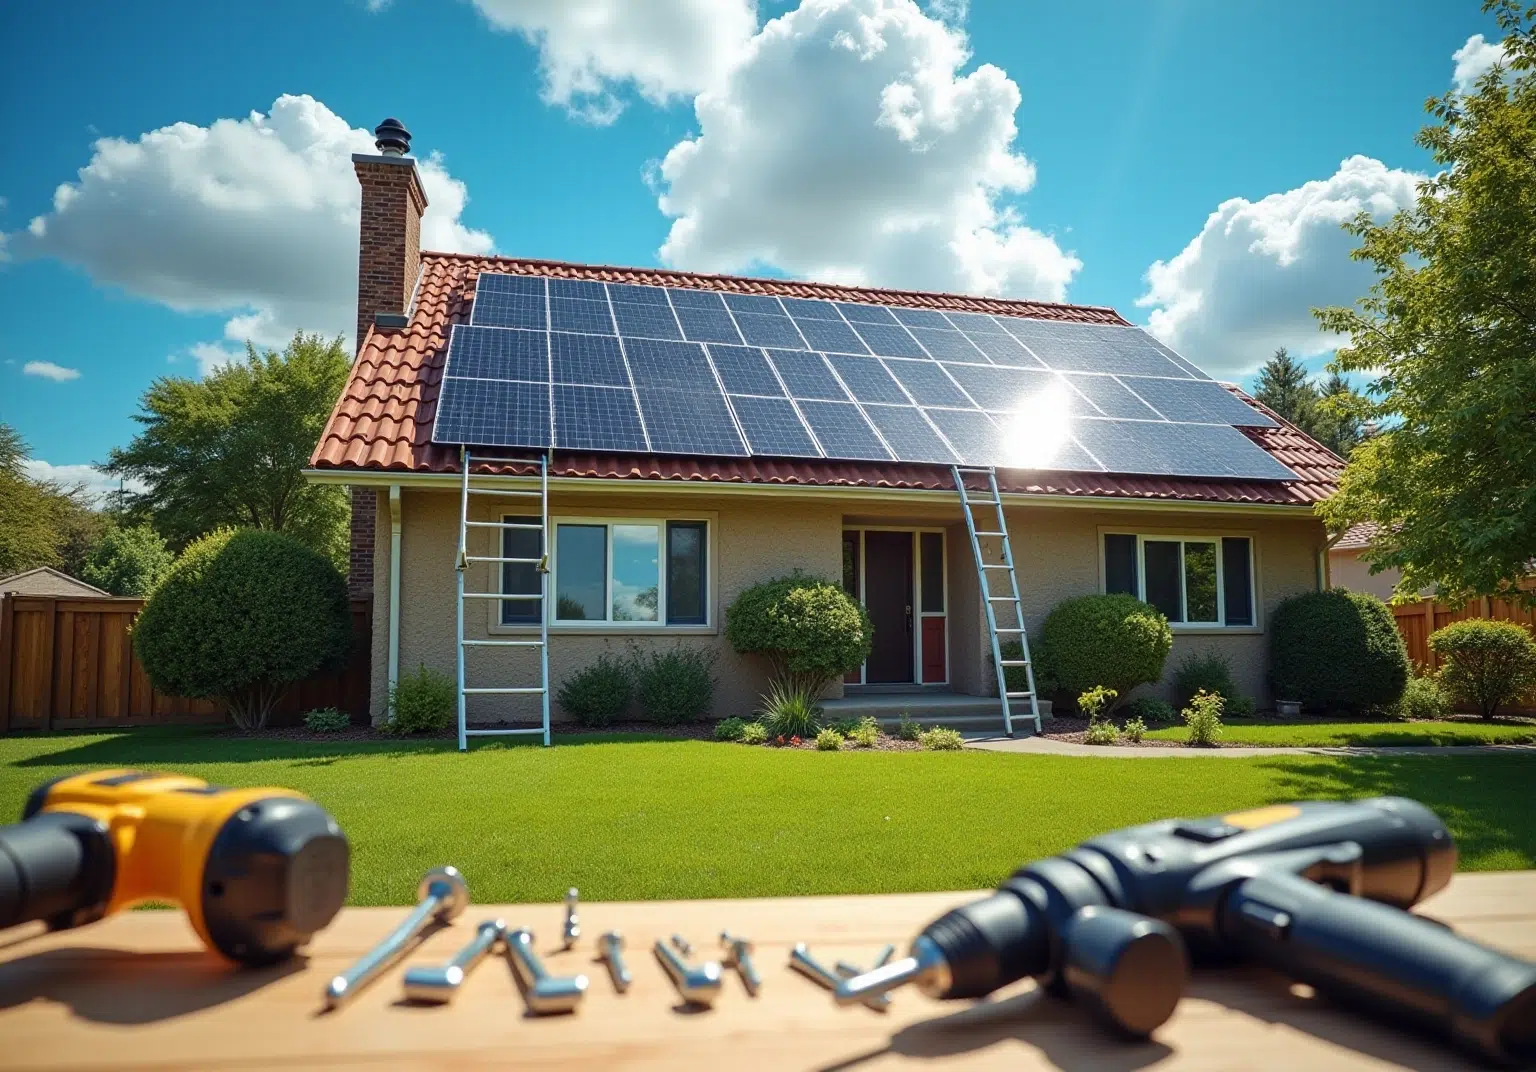
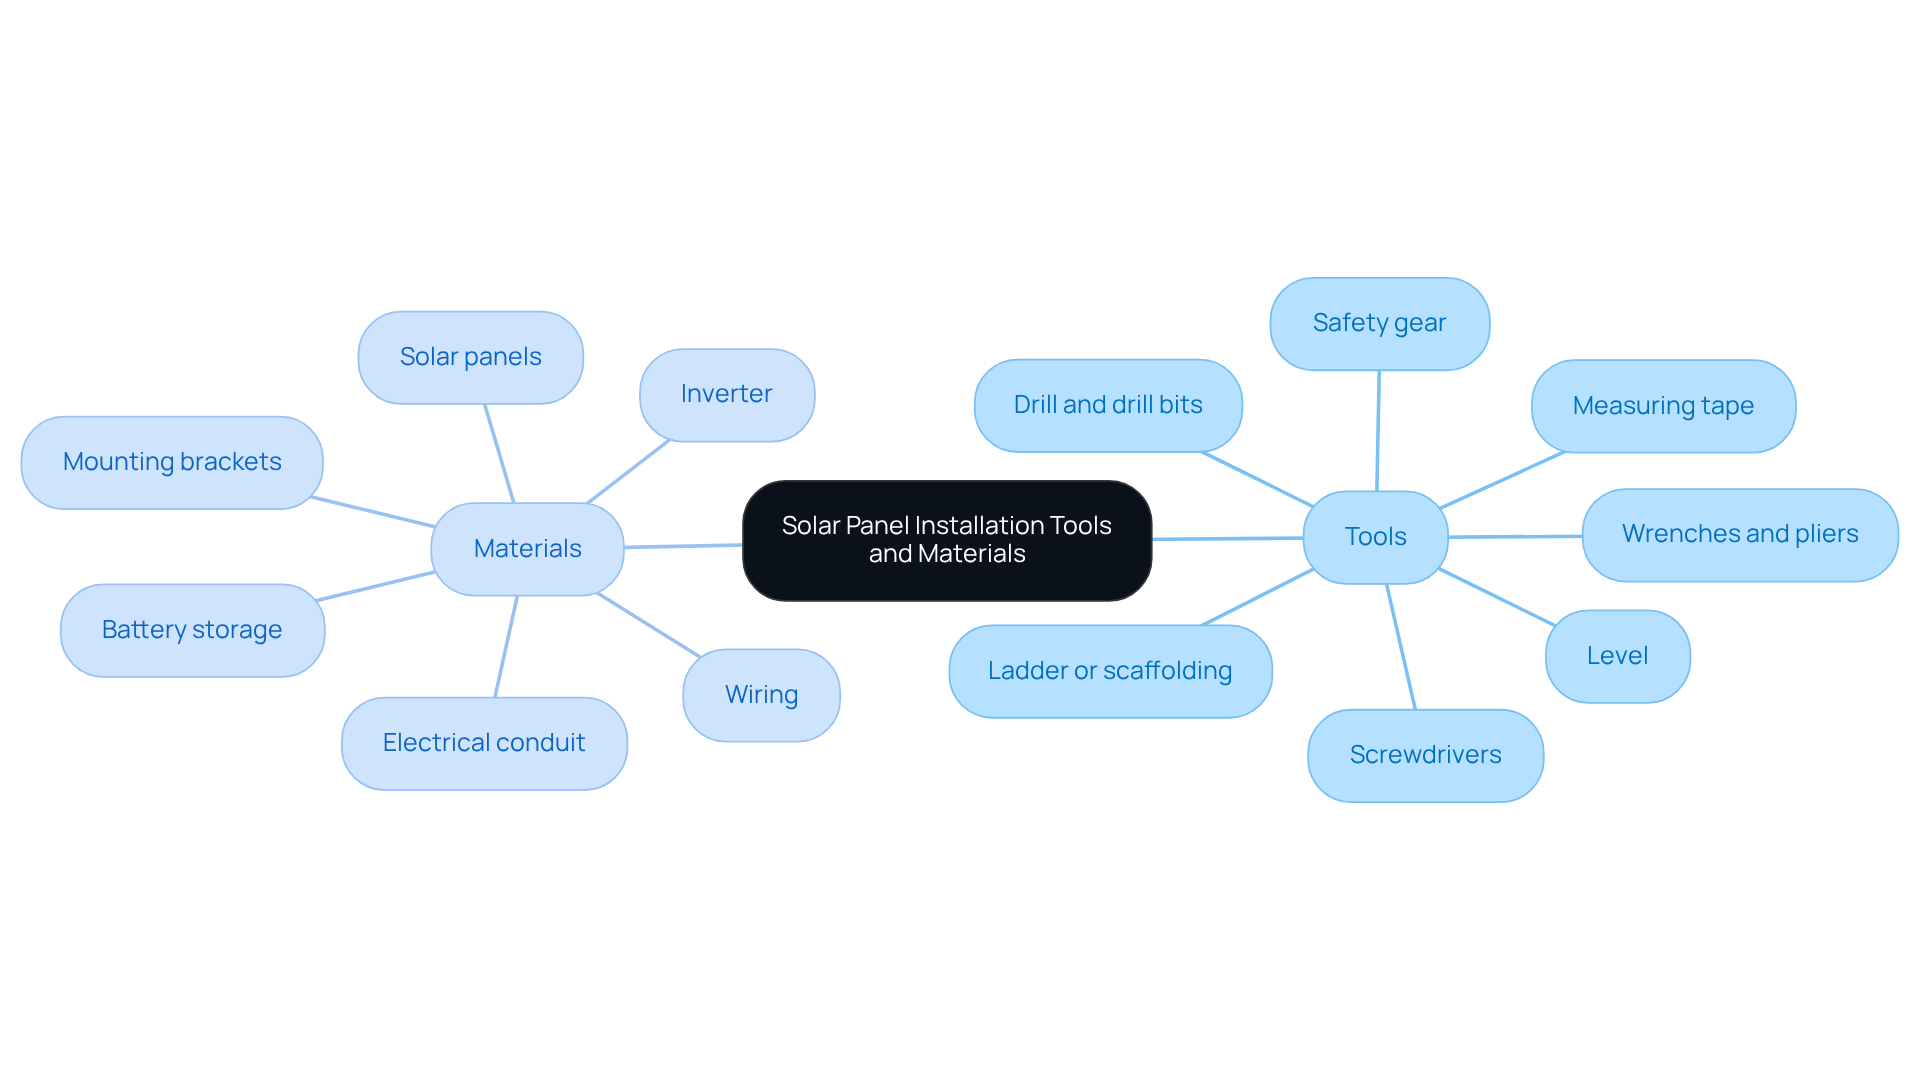
To successfully install your solar panel system, it’s important to gather the essential tools and materials that will set you up for success and peace of mind:
Tools:
- Drill and drill bits
- Screwdrivers (flathead and Phillips)
- Wrenches and pliers
- Level
- Measuring tape
- Safety gear (gloves, goggles, harness)
- Ladder or scaffolding
Materials:
- Solar panels
- Inverter
- Mounting brackets and hardware
- Wiring and connectors
- Battery storage (if applicable)
- Electrical conduit
Having these tools and materials ready before you begin will streamline the installation process, minimizing delays and ensuring a smoother experience. We understand that are crucial; they can greatly influence the effectiveness and safety of your setup. For instance, a dependable inverter is essential for transforming the sunlight produced into usable electricity, while appropriate safety equipment safeguards you during the setup. Successful installations of a solar panel system DIY often highlight the importance of preparation and the right tools. Together, we can demonstrate how homeowners can efficiently utilize renewable energy, paving the way towards a brighter, more sustainable future.
Install the Solar Panel System
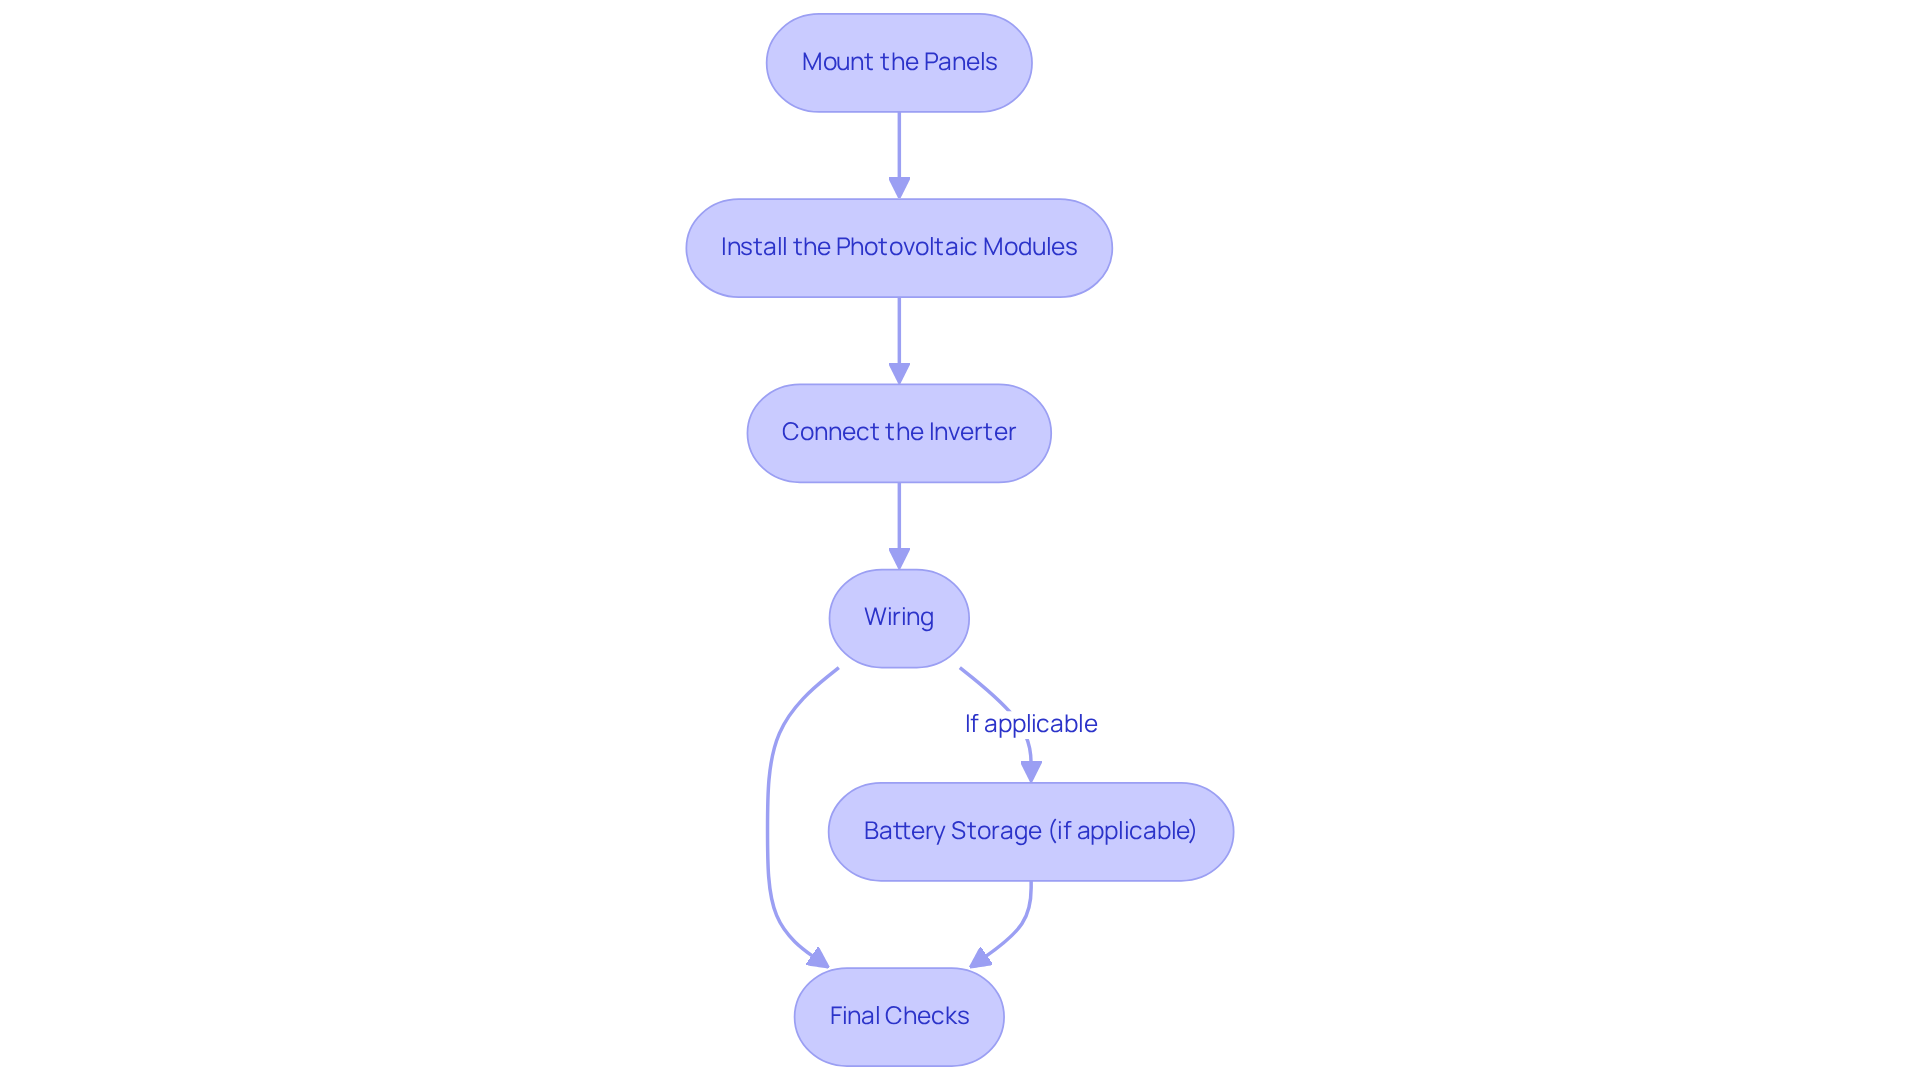
To successfully install your solar panel system and take a step towards energy independence, let’s walk through these essential steps together:
- Mount the Panels: Begin by securing the mounting brackets to your roof, following the manufacturer’s instructions closely. It’s important to ensure they are level and spaced appropriately to accommodate the energy modules. Remember to leave a minimum clearance of 10 mm between units to allow for thermal expansion, as this will help your system perform optimally.
- Install the Photovoltaic Modules: Next, affix the photovoltaic modules to the mounting brackets. Make sure they are firmly secured with at least four points of attachment. Following the manufacturer’s guidelines for orientation and spacing is crucial—typically, a tilt of 15 to 20 degrees will provide the best sunlight exposure.
- Connect the Inverter: Now, install the inverter near the panels and connect it to the panels using the appropriate wiring. It’s essential to ensure all connections are tight and secure; improper connections can lead to performance issues that you’ll want to avoid.
- Wiring: Connect the inverter to your . This may involve running conduit and wiring through your attic or walls. We understand that adhering to local electrical codes is vital for safety and compliance, so take your time with this step.
- Battery Storage (if applicable): If you’re considering battery storage, connect the batteries to the inverter according to the manufacturer’s instructions. This step is particularly important for homeowners who wish to store solar power for future use. Did you know that 80% of homeowners choose battery storage primarily for backup electricity? This option can provide peace of mind during outages.
- Final Checks: Finally, double-check all connections to ensure everything is secure. Take a moment to examine the system and verify that it is operating properly before completing the setup. Frequent problems during setup can arise from underestimating power requirements or overlooking roof evaluations, so comprehensive inspections are essential.
By following these steps and recommended practices, you can efficiently set up your energy system and begin harnessing the power of sunlight for your home. Additionally, don’t forget to consider the investment tax credit (ITC) for solar panel installations, which can provide significant financial benefits. Together, we can make a positive impact on your energy future.
Conclusion
As homeowners, we often find ourselves concerned about rising energy bills and the impact they have on our budgets. Harnessing solar energy through a DIY solar panel system not only empowers you to take control of your energy consumption but also contributes to a more sustainable future. In this article, we’ve walked you through the essential steps involved in planning, gathering materials, and installing your solar panel system. We’ve highlighted the significant advantages of adopting solar power, including cost savings and reduced carbon emissions.
Understanding the fundamentals of solar energy is crucial. By assessing your personal energy needs and selecting appropriate components, you can ensure compliance with local regulations. Each step—from planning and budgeting to installation—plays a vital role in successfully implementing your solar energy system. Imagine the potential to save an average of $1,500 annually on utility bills and recouping costs within just a few years. Transitioning to solar power is not just a smart financial decision; it’s an environmentally responsible choice that nurtures our planet.
As you embark on this journey toward energy independence, it’s essential to recognize the broader implications of adopting renewable energy sources. By investing in a solar panel system, you enhance your own energy security while contributing to a collective effort in combating climate change. Together, we can take meaningful steps toward a brighter, more sustainable future. Every homeowner has the opportunity to be part of this transformative movement, and we are here to support you every step of the way. Let’s work towards a more sustainable tomorrow, together.
