Overview
The article titled “10 Essential Tips for Your Solar System DIY Kit” centers on addressing the concerns many homeowners face regarding rising energy bills. We understand that the thought of installing a solar system can feel daunting, but this guide aims to provide you with the support and practical advice needed to successfully install a solar system using a DIY kit. By outlining the critical components of a solar system, the necessary installation steps, and key considerations for efficiency and compliance, we hope to empower you on your journey toward energy independence through renewable solutions.
Imagine the peace of mind that comes with knowing you are taking control of your energy future. Solar energy not only offers a sustainable solution but also helps reduce your reliance on traditional power sources. Together, we can explore the benefits of harnessing the sun’s power, allowing you to save money and contribute to a healthier planet.
As you read through this article, consider these essential tips as your roadmap. We encourage you to reflect on your current energy habits and envision how a solar system could transform your home. Remember, you are not alone in this process; we are here to guide you every step of the way.
Let’s work towards making your solar energy dreams a reality, ensuring you feel informed and confident as you embark on this rewarding journey.
Introduction
As energy costs continue to rise, many homeowners find themselves feeling overwhelmed and concerned about their utility bills. It’s completely understandable to seek sustainable solutions that can help regain control over these expenses. A solar system DIY kit offers an empowering opportunity to harness renewable energy, potentially leading to significant reductions in monthly costs.
However, we understand that the journey toward energy independence can be fraught with challenges. From selecting the right components to navigating local regulations, it’s common to feel uncertain about where to start.
What essential tips can help DIY enthusiasts successfully implement a solar solution, ensuring efficiency and compliance every step of the way? Together, we can explore these solutions and support you in making informed decisions for a brighter, more sustainable future.
Powercore Electric: Comprehensive Solar Solutions for DIY Enthusiasts
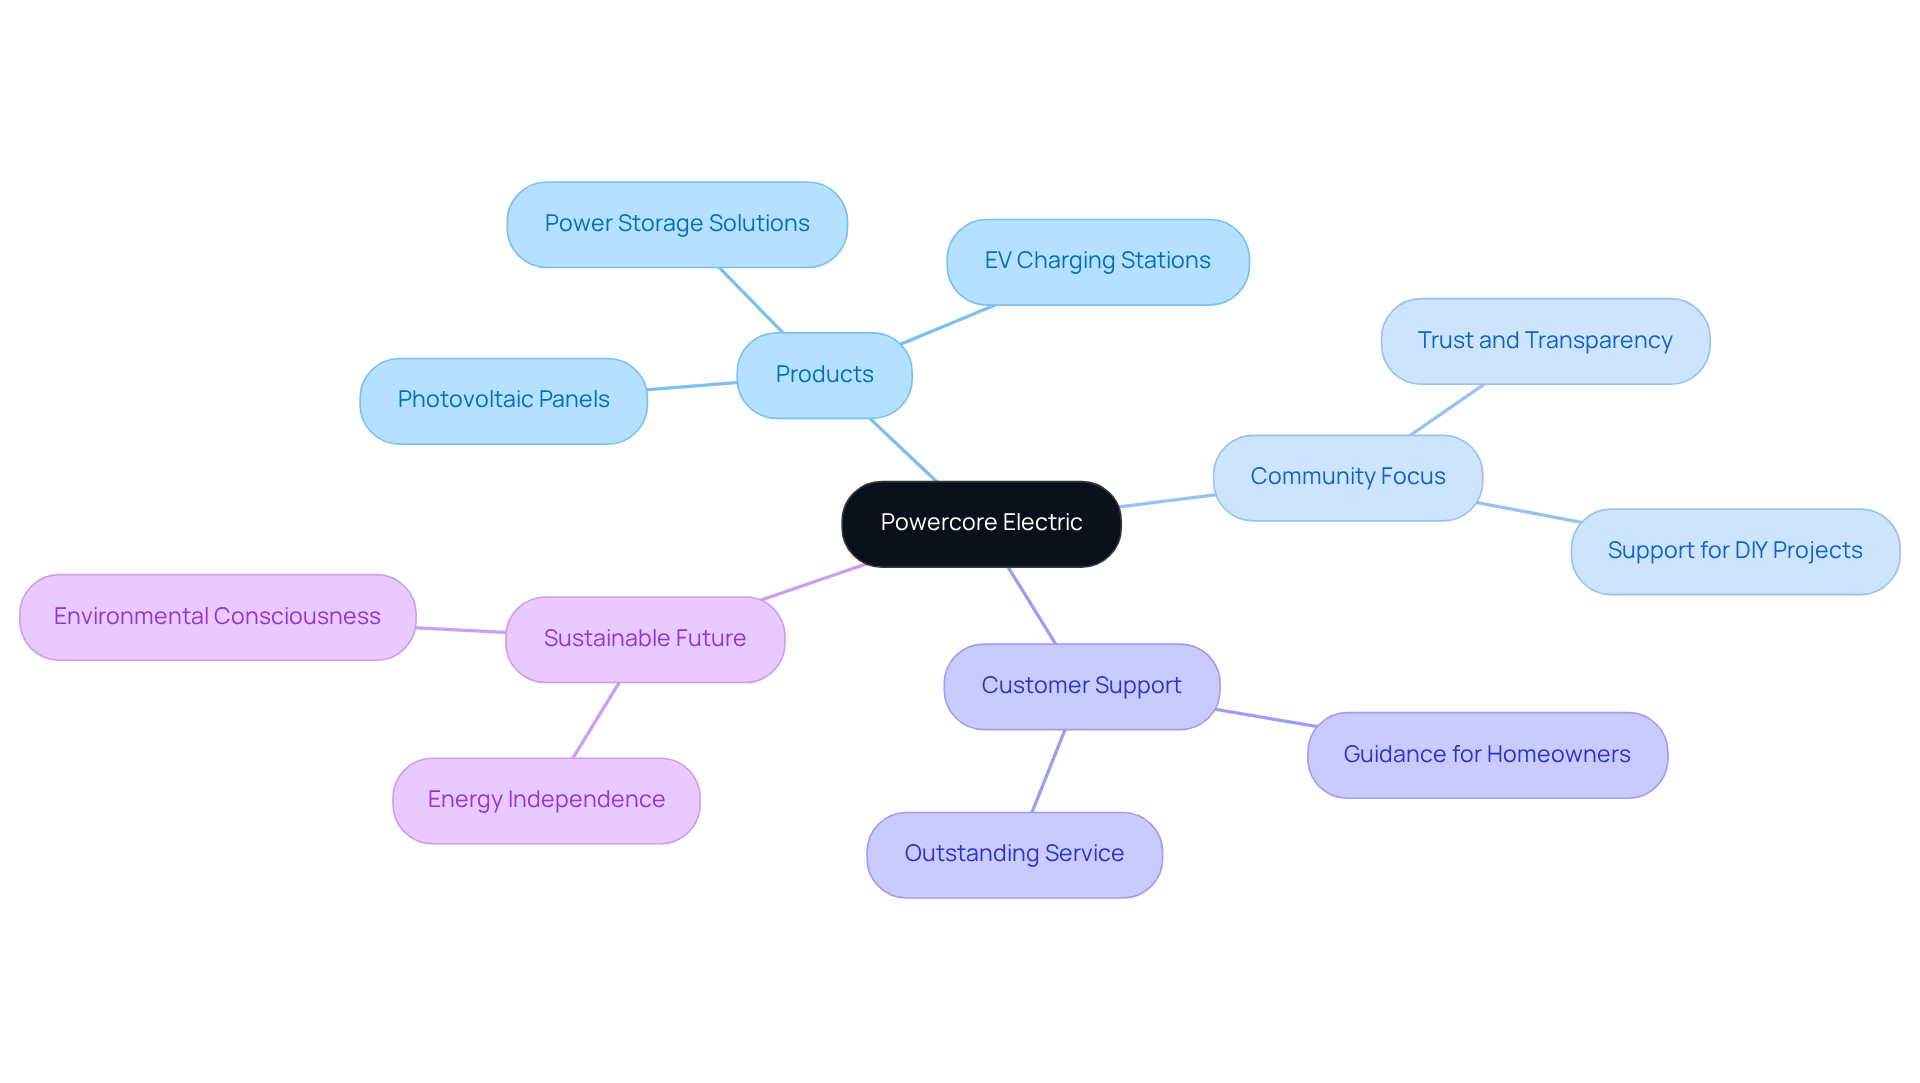
At Powercore Electric, we understand that rising energy bills can be a source of concern for many homeowners. For over 30 years, our family-run enterprise in Roseville, California, has been dedicated to providing renewable power solutions that not only address these worries but also empower you to take control of your energy future. With a diverse range of products, including , power storage solutions, and EV charging stations, we are here to support DIY enthusiasts like you with the tools and assistance needed for successful renewable projects, such as a solar system DIY kit.
As California leads the way in renewable power adoption—over 2.1 million homes utilizing alternative solutions as of 2025—we are proud to distinguish ourselves through our community focus and commitment to transparency. We believe that this approach cultivates trust, ensuring you can effectively and sustainably harness renewable power in your home. It’s common to feel overwhelmed by the options available, but rest assured, we are here to guide you every step of the way.
As the market for solar system DIY kits continues to grow, we invite you to consider the benefits of solar energy and the independence that a solar system DIY kit can bring. Together, we can explore innovative solutions tailored to your unique needs as an environmentally conscious homeowner. Powercore Electric is not just a provider; we are your dependable partner, offering outstanding service and creative solutions to help you achieve energy independence. Let’s work towards a sustainable future together—contact us today to begin your journey towards a more empowered and eco-friendly home.
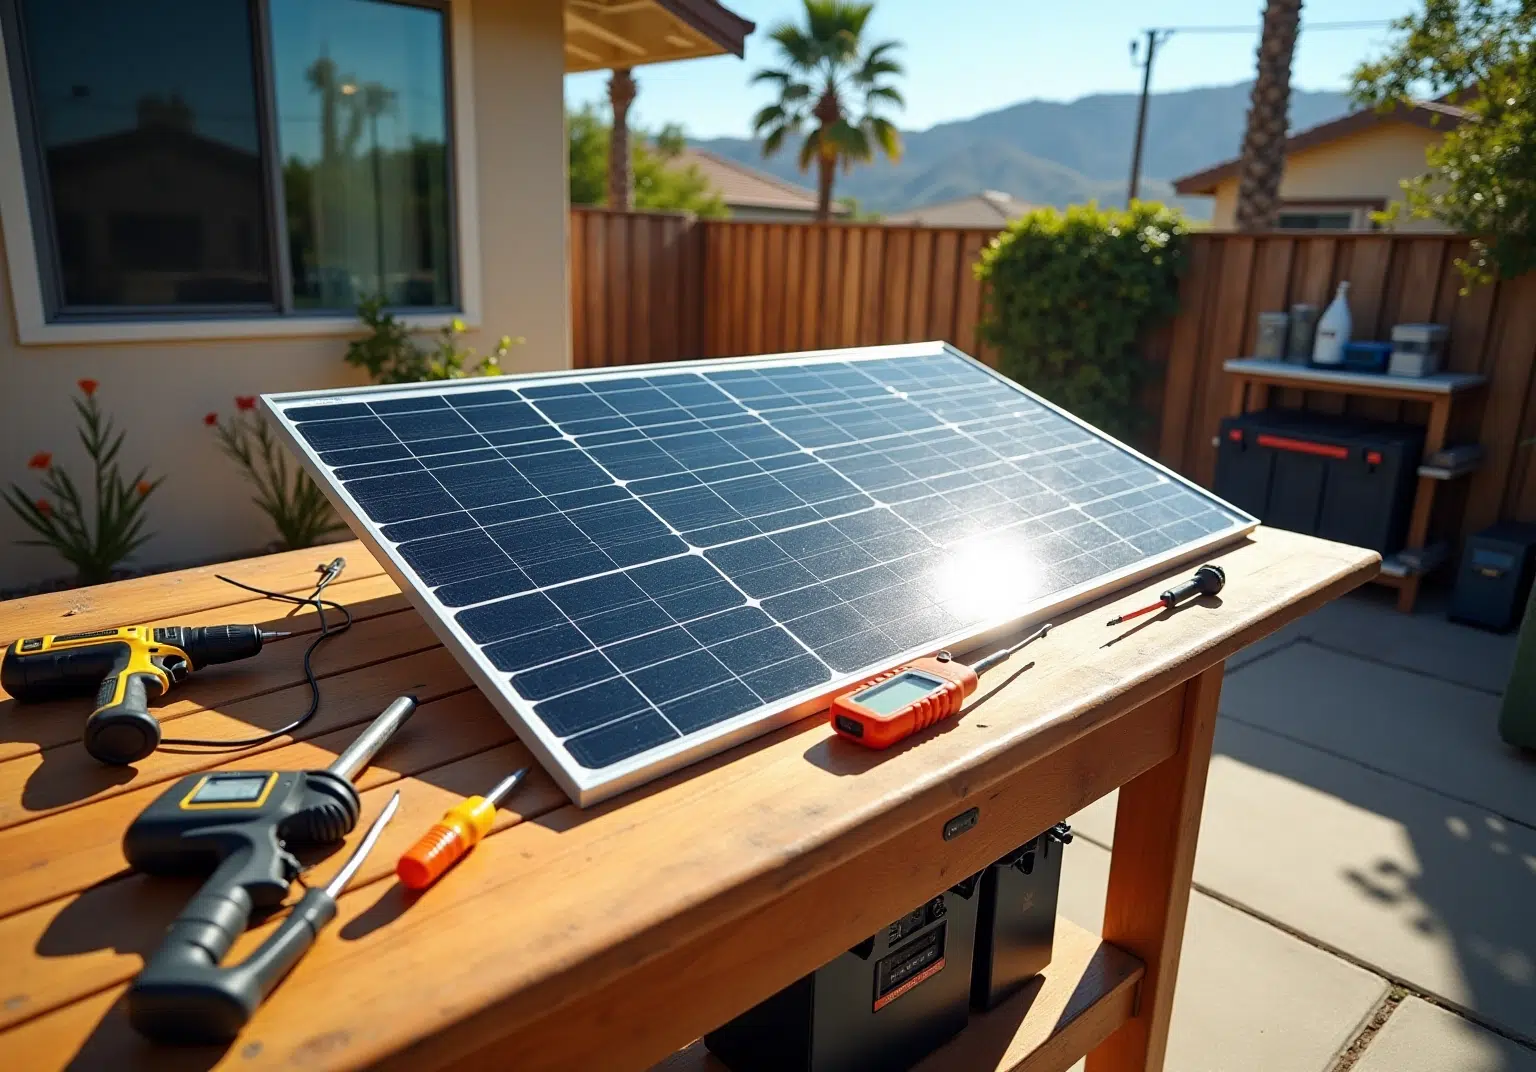
Component Knowledge: Essential Parts of a Solar System DIY Kit
Are you feeling overwhelmed by rising energy bills? You’re not alone. Many homeowners share this concern, and it’s completely understandable. The good news is that a typical solar system DIY kit can offer a sustainable solution that not only alleviates those worries but also empowers you to take control of your energy needs.
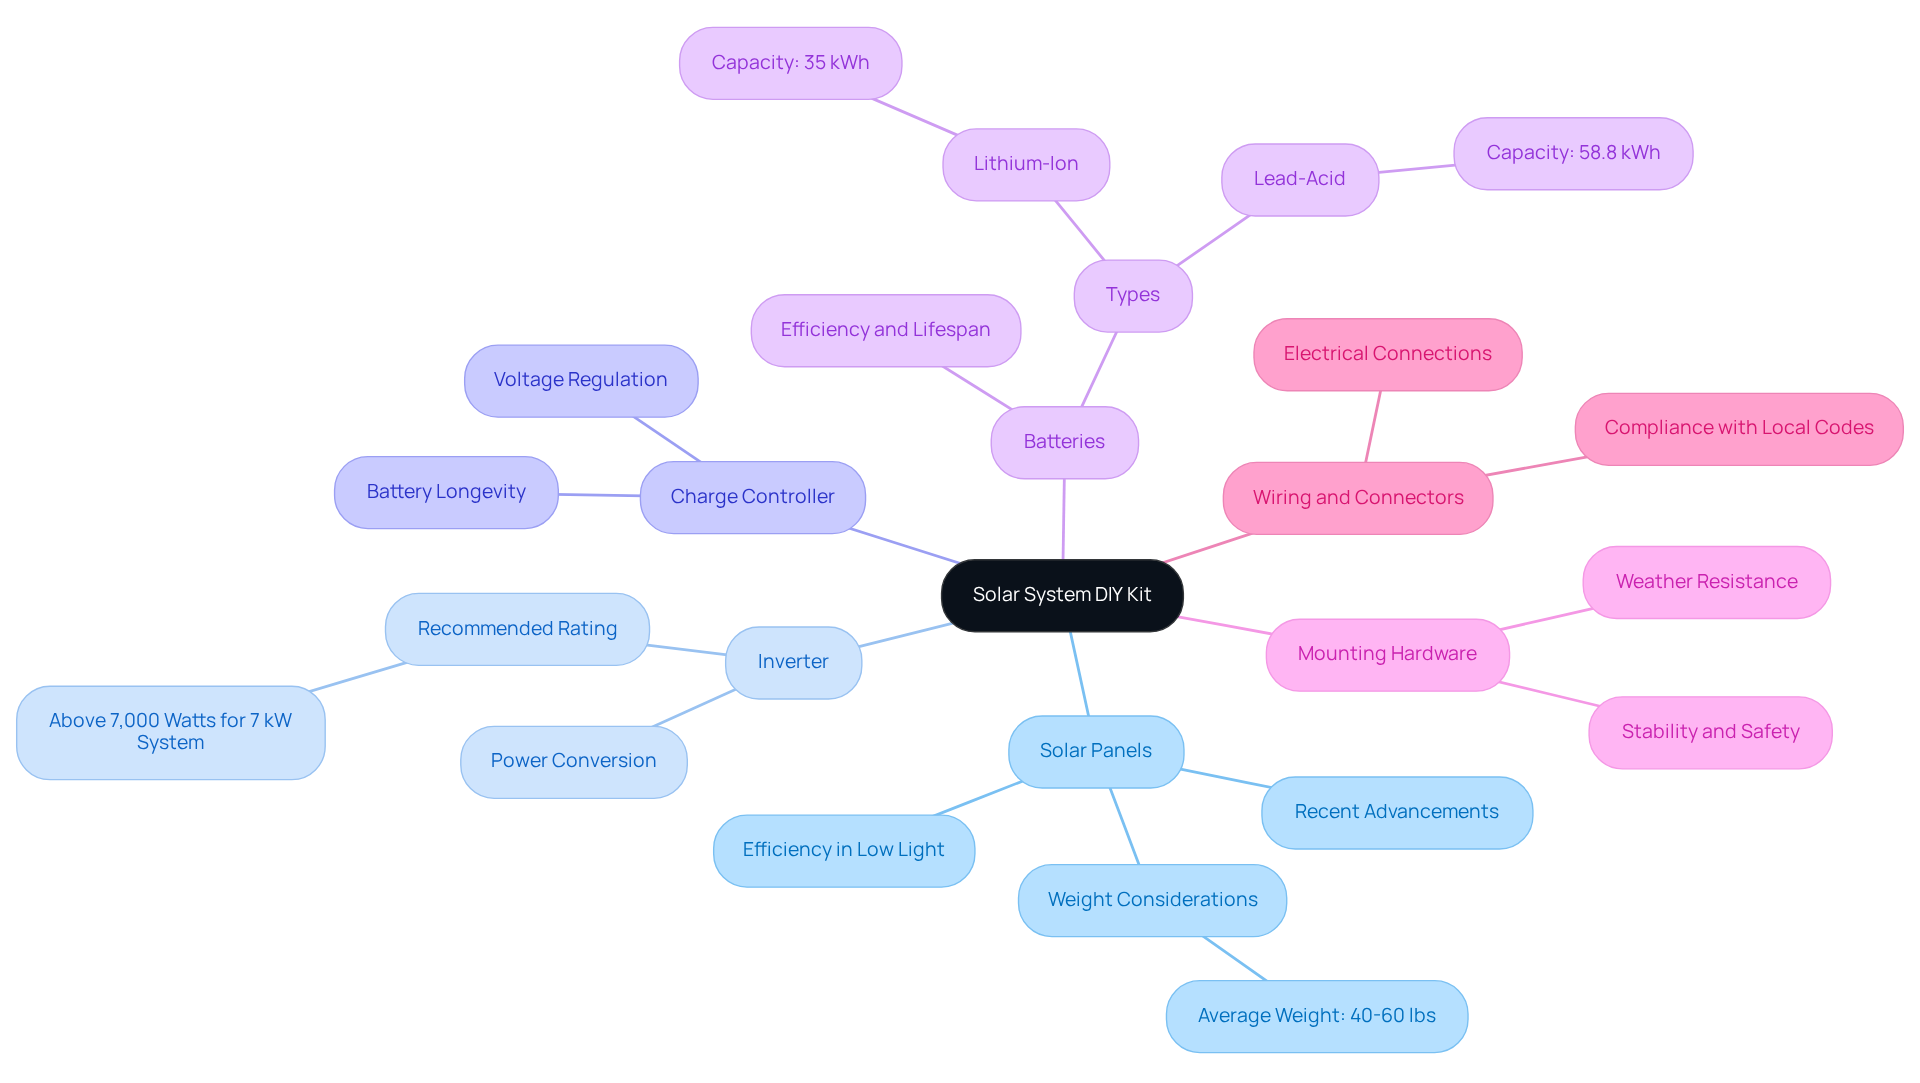
A DIY solar system kit comprises several essential components that are crucial for effective energy generation and storage:
- Solar Panels: These are the heart of the system, converting sunlight into electricity. For homeowners in regions with many overcast days, it’s vital to select photovoltaic systems engineered for maximum efficiency in low-light situations, guaranteeing dependable energy production throughout the year. The most recent advancements in photovoltaic technology have resulted in enhanced efficiency and durability, establishing them as a reliable option for homeowners.
- Inverter: This device converts the direct current (DC) electricity generated by the photovoltaic modules into alternating current (AC) electricity, which is utilized in residences. For optimal performance, it is advised that an inverter for a 7 kW setup should have a nameplate rating above 7,000 watts, ensuring effective power conversion.
- Charge Controller: This component regulates the voltage and current coming from the photovoltaic panels, preventing battery overcharging and ensuring the longevity of the battery system.
- Batteries: Essential for storing surplus power generated during sunny periods, batteries provide electricity when sunlight is not available. Homeowners can choose between lithium-ion and lead-acid batteries, each with distinct advantages and costs. Important factors for choosing a battery include capacity, efficiency, lifespan, and ecological advantages, ensuring that homeowners make informed decisions for power independence.
- Mounting Hardware: This secures the solar panels to your roof or ground, ensuring stability and safety. High-quality mounting solutions are critical for the longevity of the installation, especially in areas prone to severe weather.
- Wiring and Connectors: These enable the electrical connections among all components, ensuring safe and efficient power flow. Proper wiring techniques are crucial to adhere to local electrical regulations and to preserve integrity.
Comprehending these elements is essential for a successful installation. Together, we can effectively, allowing you to enjoy the advantages of lower utility expenses and enhanced energy independence. If you’re ready to explore this path towards energy freedom, we’re here to support you every step of the way.
Energy Needs Assessment: Tailoring Your Solar System for Maximum Efficiency
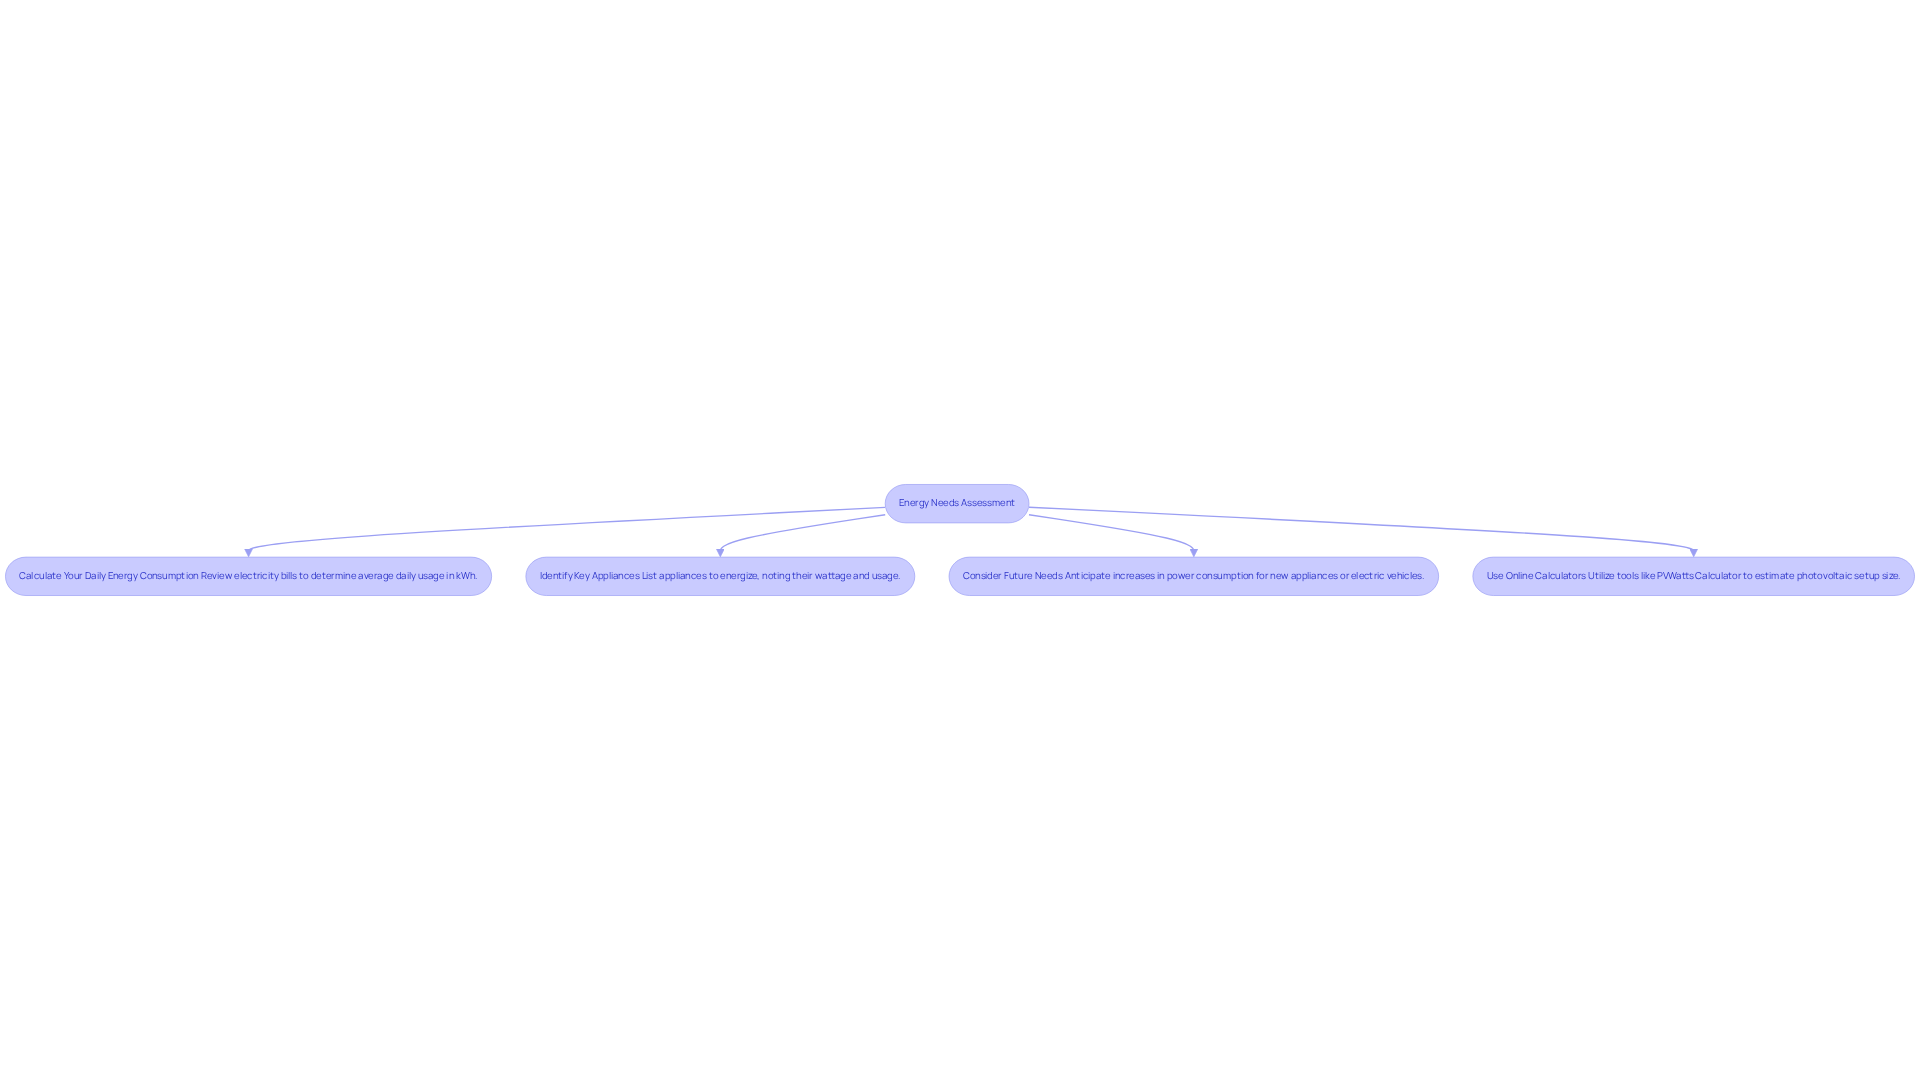
To customize your energy setup for optimal efficiency, it’s essential to start by evaluating your energy requirements, especially as a homeowner who cares about the environment and is exploring renewable power options.
Calculate Your Daily Energy Consumption: Have you ever looked closely at your electricity bills? By reviewing them, you can determine your average daily usage in kilowatt-hours (kWh). The average U.S. household consumes about 890 kWh per month, which translates to roughly 30 kWh daily. Understanding your usage is crucial for that meets your needs.
Identify Key Appliances: Consider creating a list of the appliances you plan to energize with your photovoltaic setup, noting their wattage. It’s important to recognize that HVAC systems usually account for nearly 50% of total home power use, while refrigerators consume between 100-800 kWh annually. This knowledge empowers you to choose the most effective solar solutions, such as a solar system DIY kit, tailored to your lifestyle.
Consider Future Needs: It’s common to feel uncertain about future energy demands. Anticipate any potential increases in power consumption, such as adding electric vehicles or new appliances. In warmer climates, residences may consume over 1,100 kWh monthly due to air conditioning. Planning for these future needs ensures your solar system DIY kit remains effective as your energy consumption grows. Together, we can make sure you’re prepared.
Use Online Calculators: Finally, utilize tools like the PVWatts Calculator to estimate the size of the photovoltaic setup needed based on your power usage. These calculators can help confirm that your setup is sufficiently sized to meet both current and future energy needs, aligning with the financial and ecological benefits of sustainable heating solutions. Remember, you’re not alone in this journey; we’re here to support you every step of the way.
System Compatibility: Ensuring Your DIY Kit Works with Existing Infrastructure
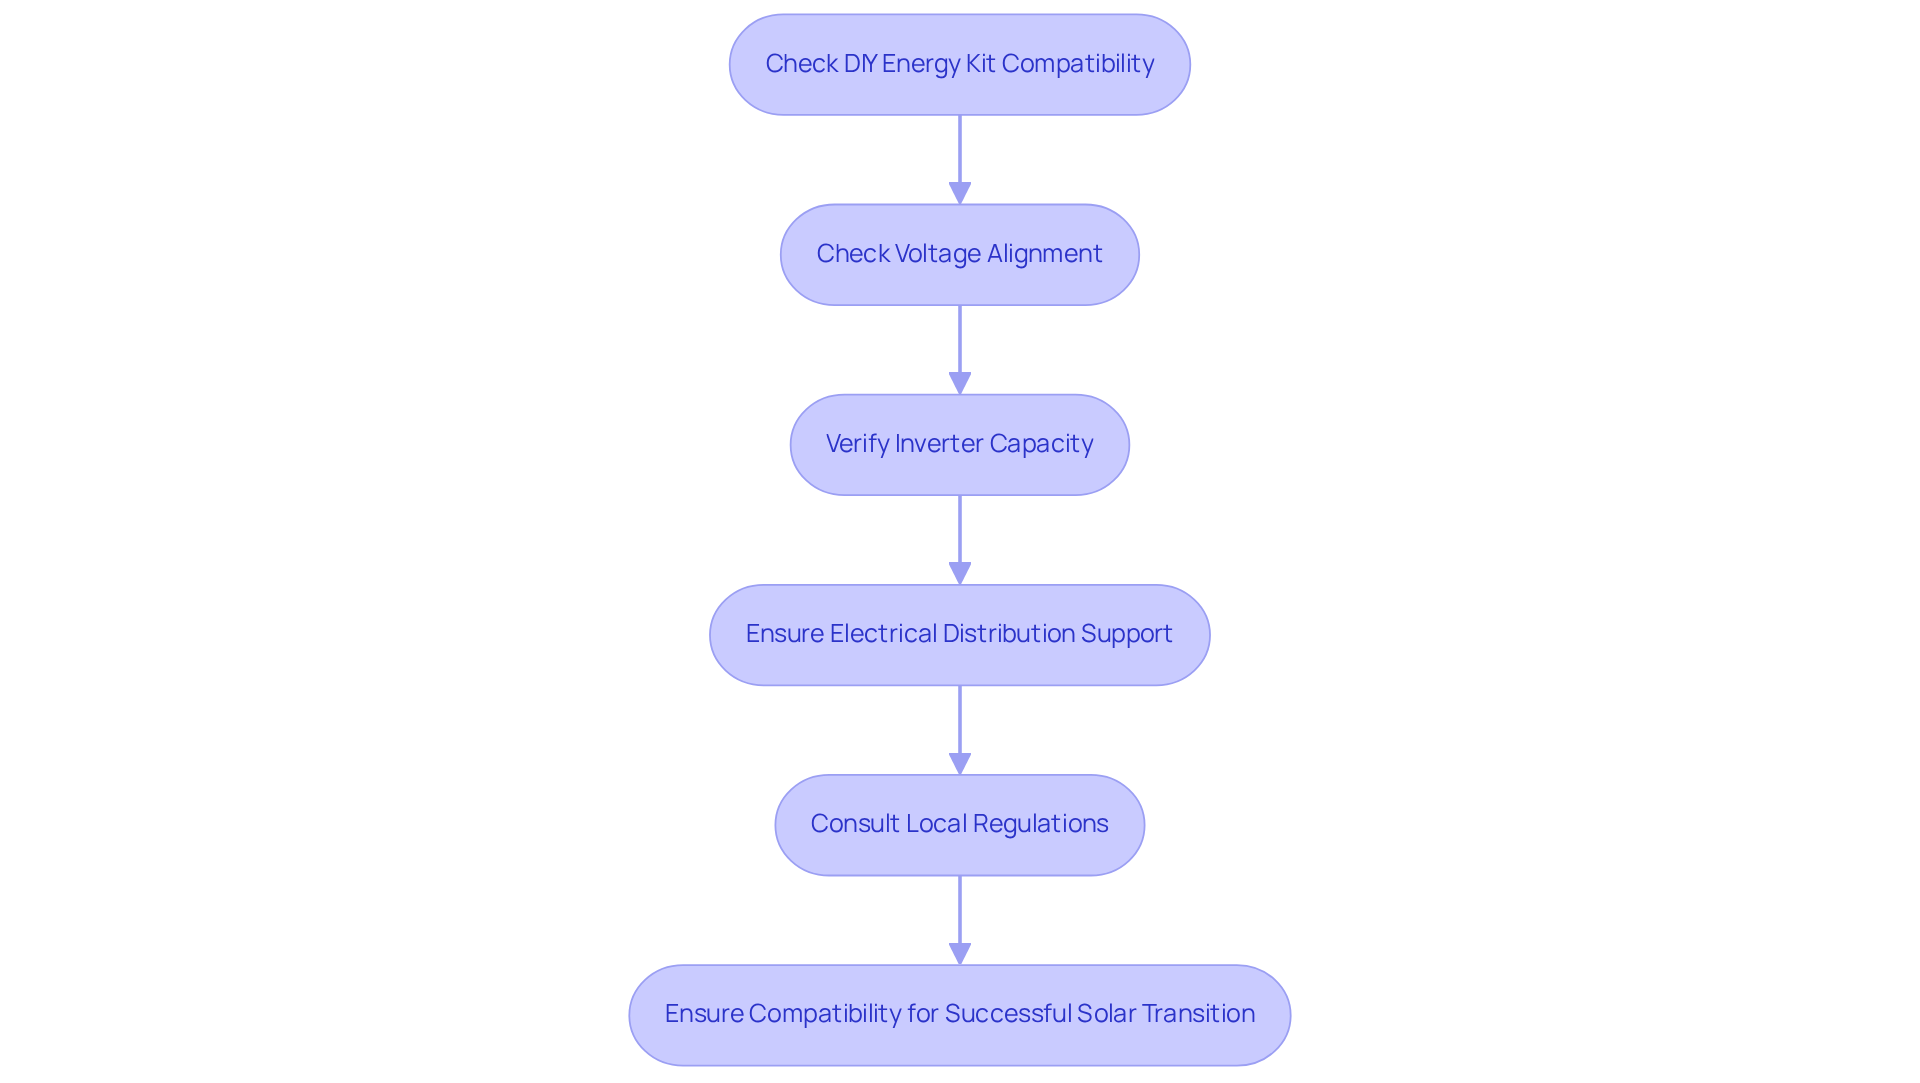
Before you make the decision to buy a DIY energy kit, we understand how important it is to ensure that it will work seamlessly with your current infrastructure. Start by checking that the voltage of your photovoltaic modules aligns with your battery and inverter setups. This voltage matching is crucial; mismatched voltages can lead to inefficiencies and even potential damage to your valuable equipment. Additionally, confirm that your inverter can handle the total wattage of your photovoltaic modules. Insufficient inverter capacity can lead to failures and decreased energy production, which is something no one wants to experience. In fact, inverter failures can reduce efficiency by 2.55% to 14.67%, highlighting the importance of selecting the right inverter for your needs.
Next, it’s essential to ensure that your electrical distribution unit can support the additional load from the solar system. In California, the average electrical service capacity in homes has evolved, with approximately 60% rated at 200 amperes or more, indicating a preparedness for increased electrical demands. However, it’s worth noting that about 31% of homes still have panels rated at 100 amperes or less, which could limit the adoption of new electric appliances without significant upgrades. We want to help you avoid any surprises as you transition to solar power.
Lastly, don’t forget to consult local regulations to ensure compliance with installation requirements. Following these guidelines is crucial to prevent issues during installation and operation, ensuring a smooth transition to solar energy. Remember, a significant 36% of lost energy production stems from inverter failures, so ensuring compatibility is key. For personalized guidance, consider reaching out to an expert who can evaluate your specific requirements regarding inverter and module compatibility. When choosing a , be sure to look for options that clearly indicate their compatibility with common battery types and inverter specifications to simplify your installation process. Together, we can work towards making your energy independence a reality.
Warranty and Support: Key Considerations for DIY Solar Kits
When selecting a , we understand that Long Beach renters may have concerns about making the right choice. It’s important to consider warranty and support aspects to ensure you feel confident in your decision:
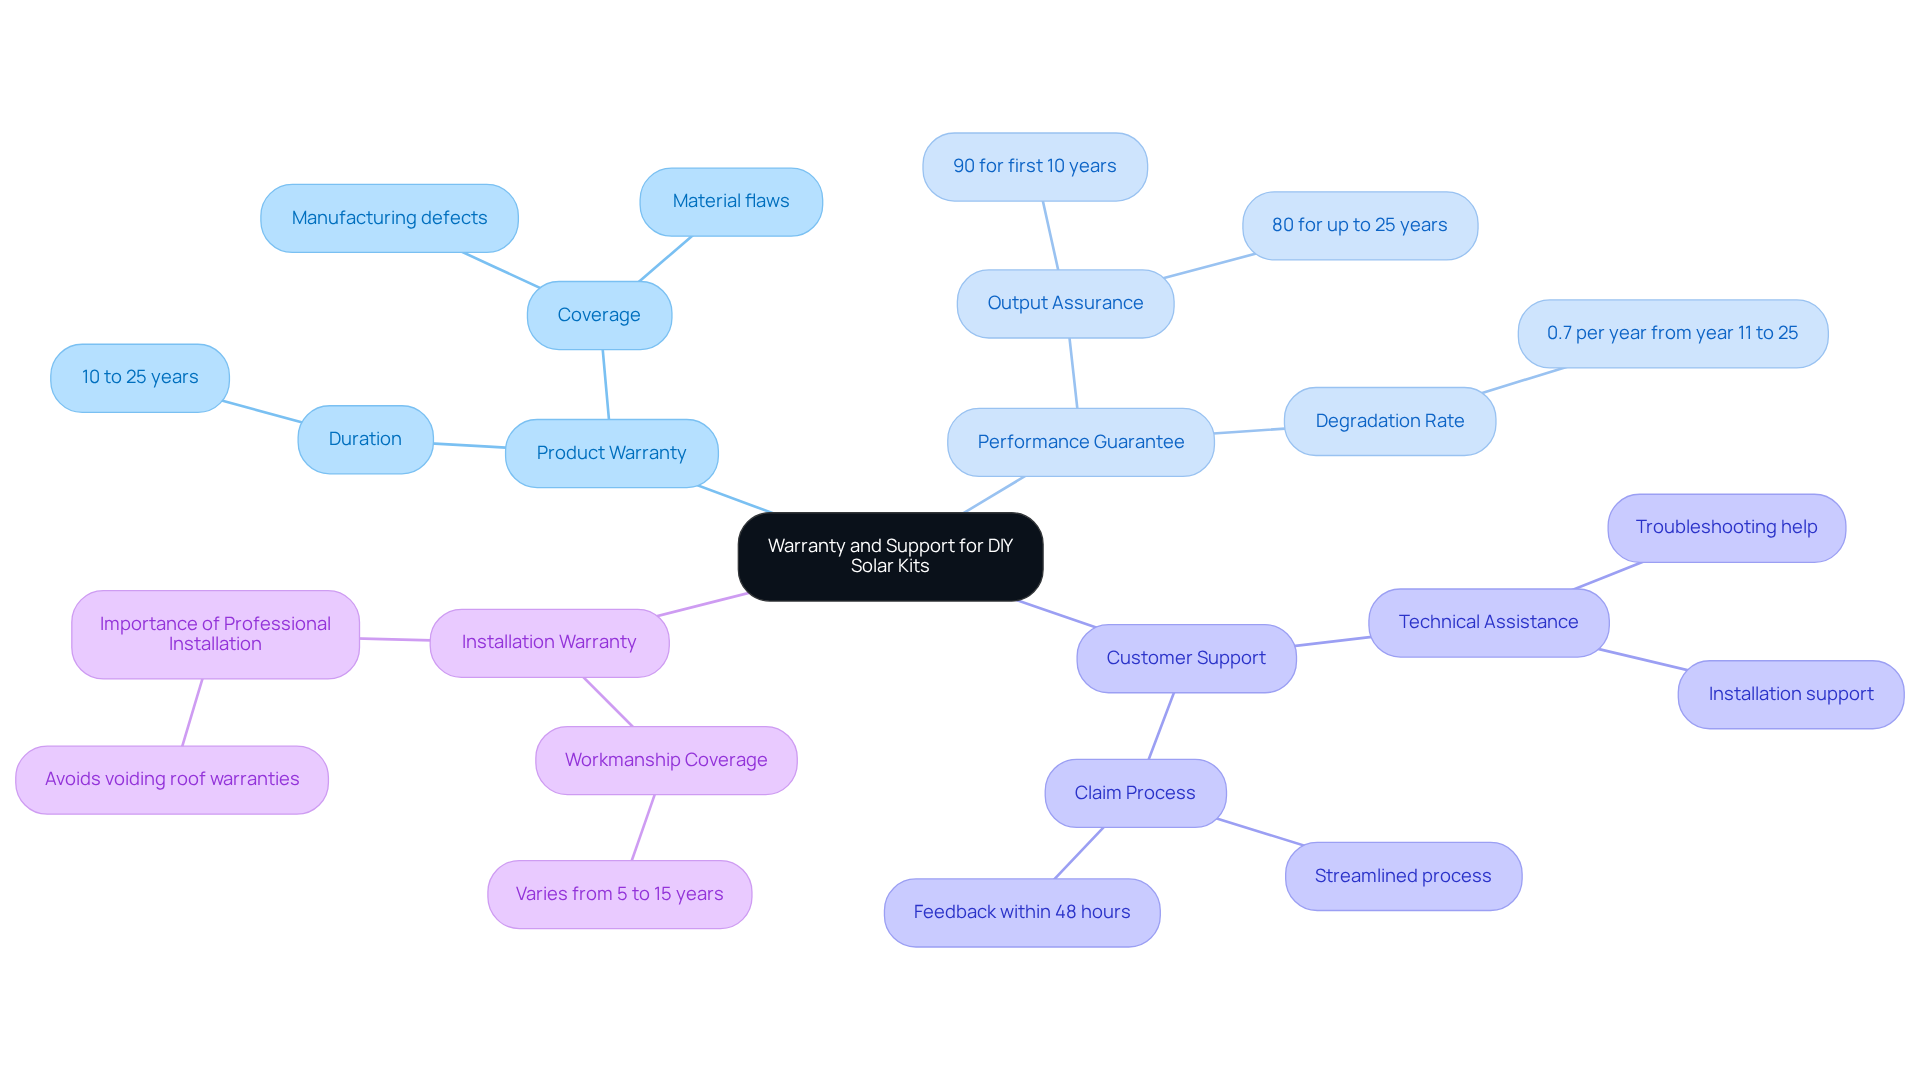
- Product Warranty: Look for kits that offer a warranty lasting between 10 to 25 years on solar panels and inverters. This duration is standard in the industry, providing peace of mind about the longevity of your investment—especially since crystalline silicon solar panels typically last 25 to 30 years.
- Performance Guarantee: It’s essential to ensure the manufacturer provides a performance guarantee that specifies a minimum level of power output over the warranty period. Many warranties assure 90% output for the first ten years and 80% for up to 25 years. This guarantee is crucial for optimizing your savings and protecting against efficiency decline.
- Customer Support: We encourage you to investigate whether the company offers robust technical support during installation and troubleshooting. Effective customer support can significantly enhance your DIY experience, helping you resolve issues swiftly. Companies like Ksquare Energy emphasize their commitment to customer support, ensuring a seamless warranty claims process.
- Installation Warranty: If you decide to hire assistance for installation, confirm that the contractor provides a warranty on their workmanship. This additional layer of protection can save you from unexpected repair costs and ensure that the installation meets quality standards.
Furthermore, Long Beach tenants should explore community government initiatives that may offer incentives or discounts for renewable installations, making it more economical to embrace environmentally friendly solutions. By prioritizing these factors and recognizing that warranties typically cover flaws in materials and craftsmanship but may exclude damage from external elements, you can enhance the reliability and performance of your energy system. Documenting your installation process and maintenance activities can also support any future warranty claims. Together, we can make informed choices that lead to energy independence and sustainability.
Regulatory Compliance: Navigating Local Permits for Your Solar Project
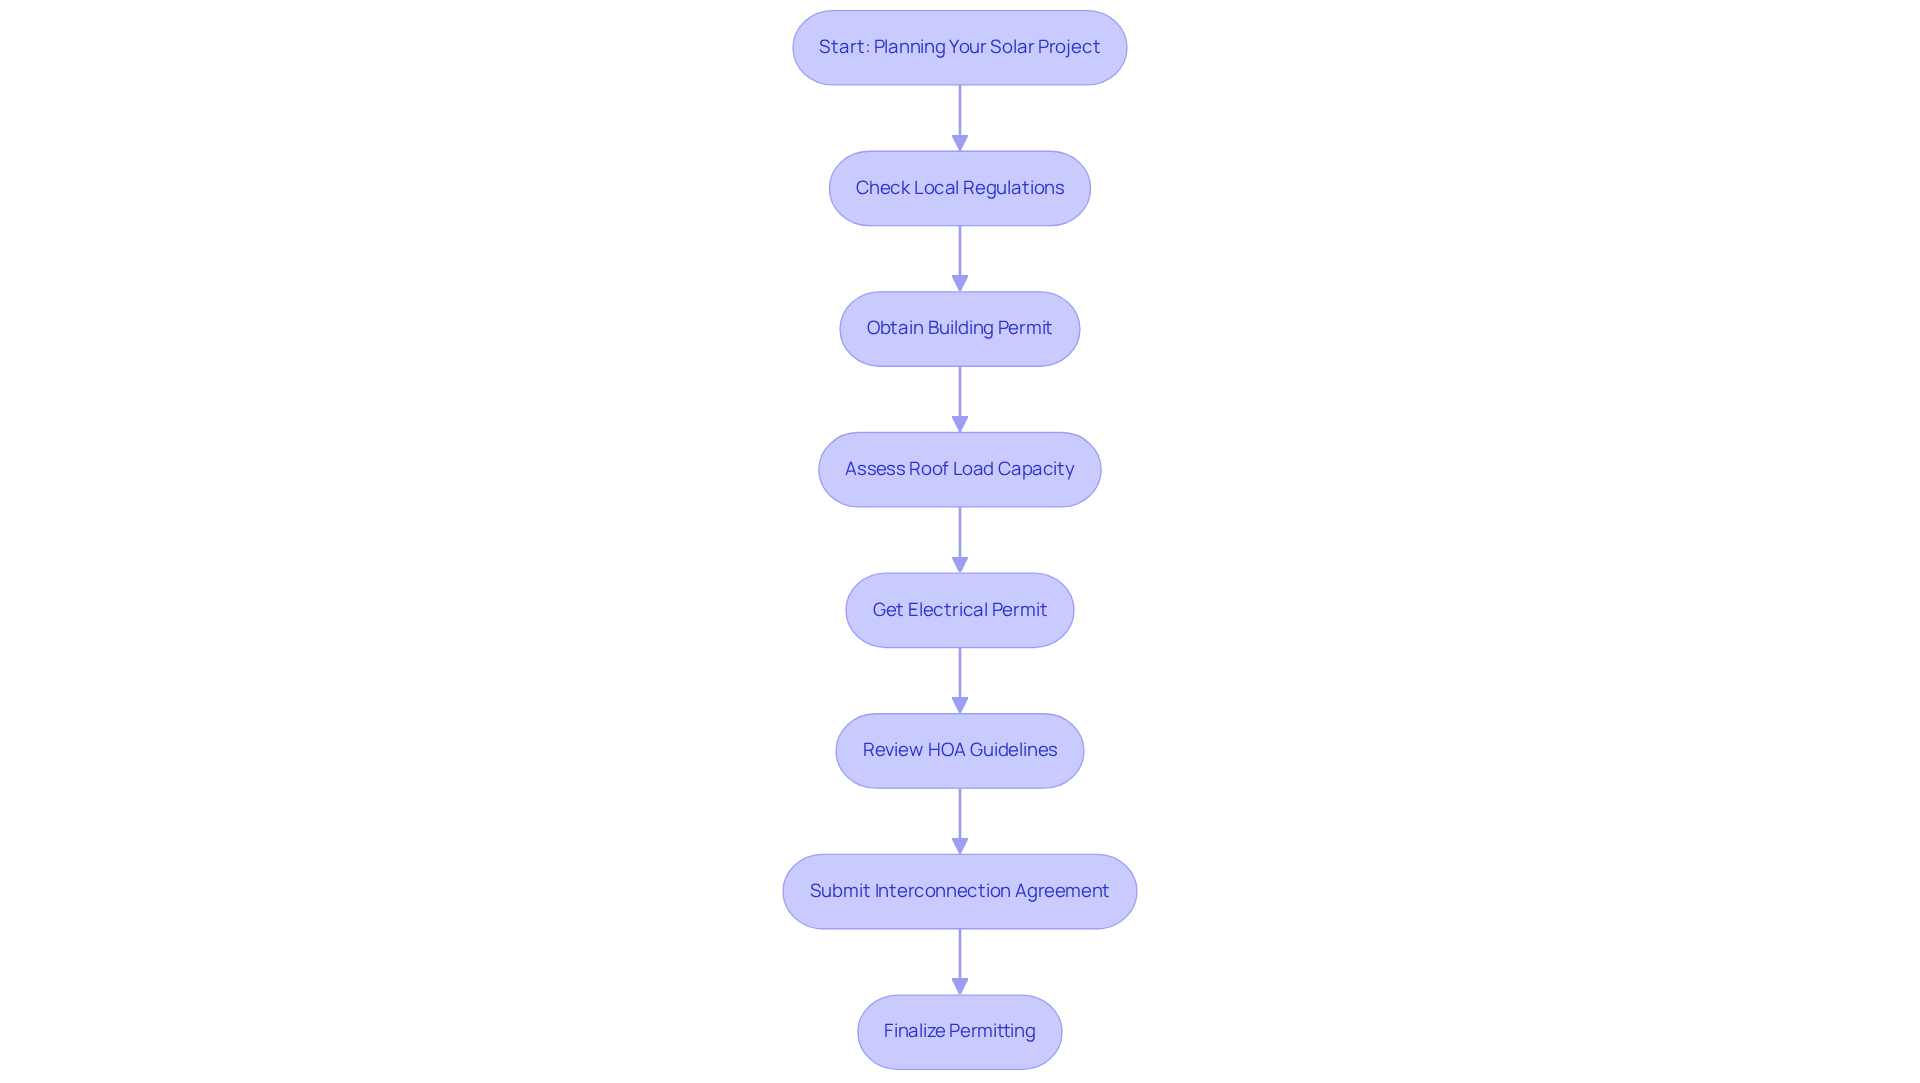
Before embarking on your DIY renewable energy project, we understand that navigating local regulations and permitting requirements can feel overwhelming. It’s essential to comprehend these guidelines to ensure a smooth installation process. In most areas of California, obtaining a building permit is necessary to confirm that your structure can support the additional load from photovoltaic panels. This consideration includes assessing roof load capacity and the reliability of the mounting structure. Moreover, an electrical permit is often required to ensure that all wiring, inverters, and electrical connections adhere to safety standards, in accordance with the California Electrical Code.
Homeowners should also take a moment to check if their Homeowners’ Association (HOA) has specific guidelines regarding solar installations, as these can vary significantly. If you plan to connect your setup to the grid, submitting an interconnection agreement with your utility provider is generally a necessary step. Understanding these requirements is crucial to , or even the removal of your setup.
In California, the costs associated with permitting for photovoltaic installations typically range from $100 to $500, depending on the location and equipment size. Fortunately, streamlined procedures have been established for small residential energy installations (up to 10 kW), allowing permits to be processed in just a few days. However, larger setups may involve additional steps, so proper preparation and timely document submission are essential for a seamless installation. By effectively navigating these regulatory requirements, we can work together to ensure compliance and help you enjoy the numerous advantages of your energy system.
Cost Efficiency: Understanding Savings and Incentives for DIY Solar Kits
Investing in a solar system DIY kit can lead to substantial savings for homeowners like you. We understand that rising energy bills can be a source of concern, and exploring is a step toward greater financial freedom. Here are some key considerations that can help you on this journey:
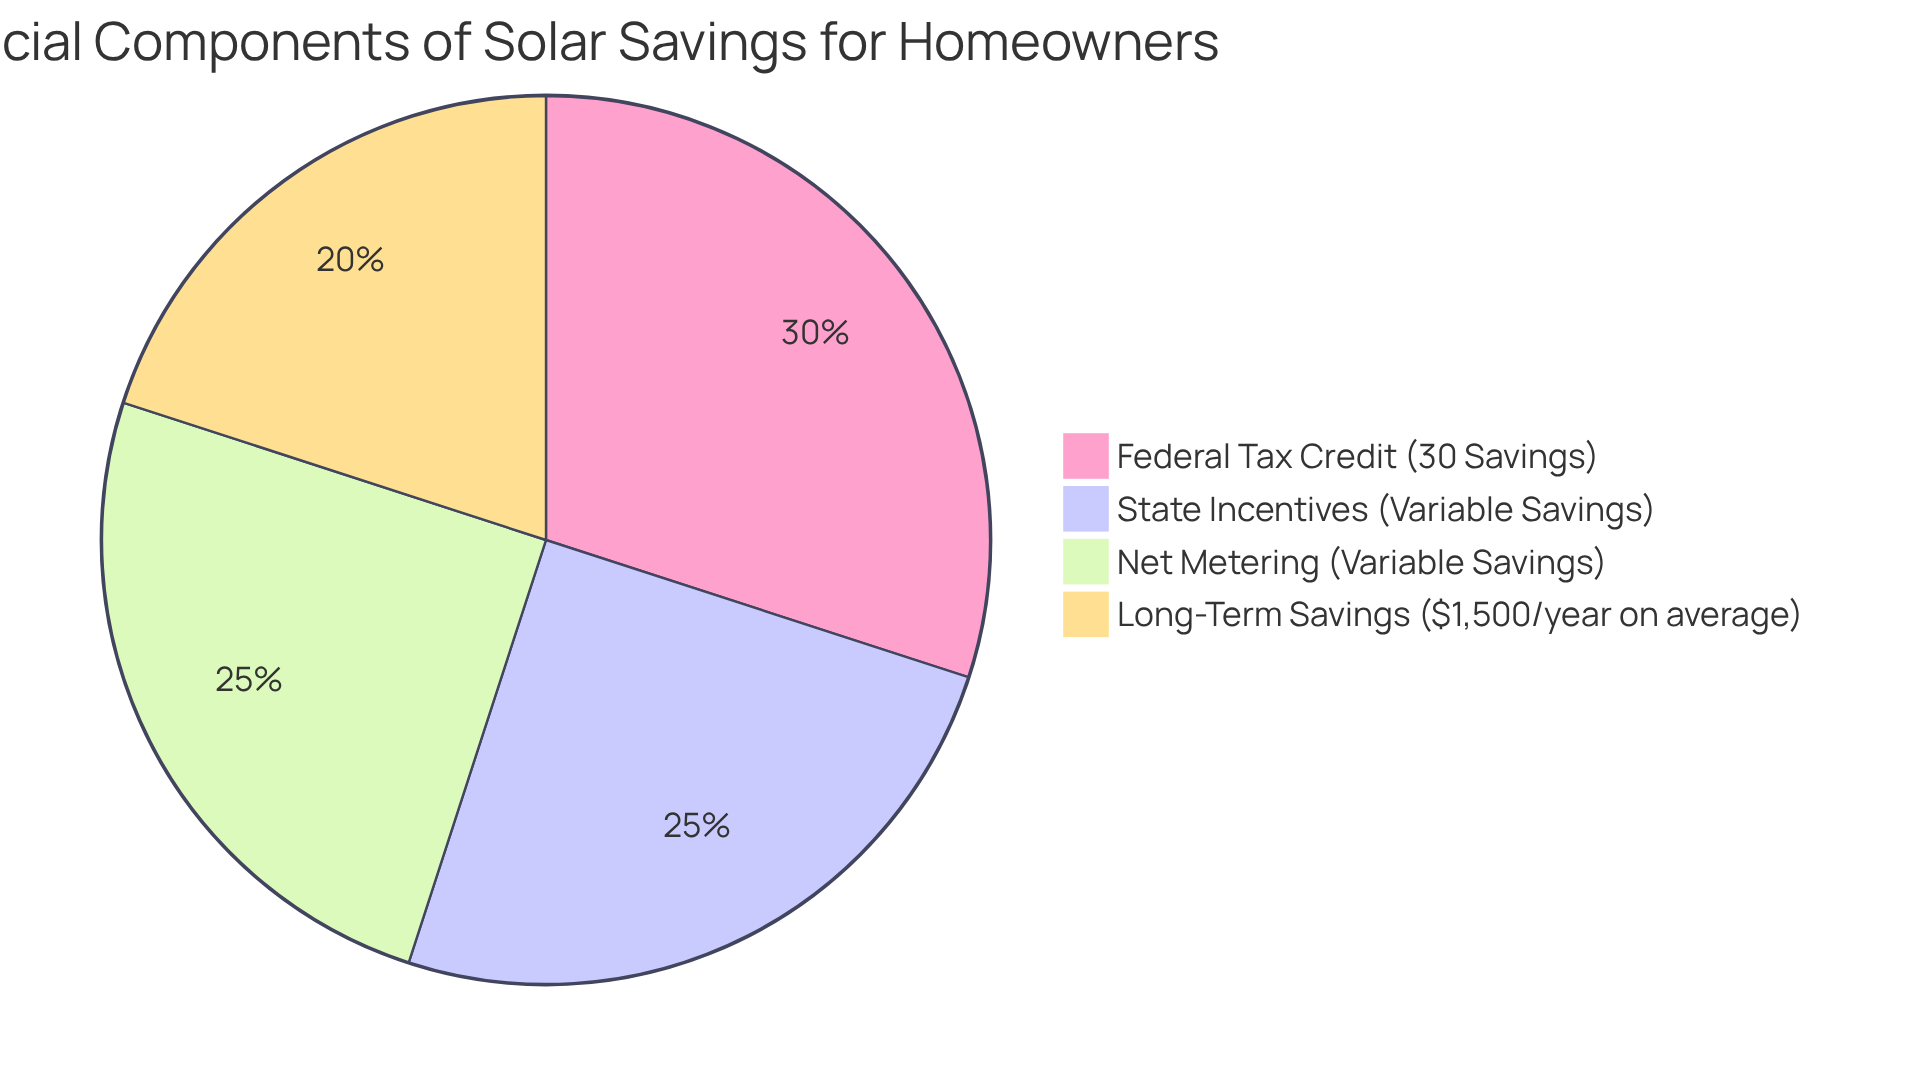
- Federal Tax Credit: Homeowners can take advantage of the Residential Clean Energy Credit, allowing you to claim a tax credit of up to 30% of your installation costs. This incentive is offered for installations finished prior to 2032, creating a timely opportunity for those of you seeking to transition to renewable energy.
- State Incentives: In California, for instance, various rebates and incentives can significantly reduce the initial expenses of photovoltaic installations. Researching your state’s specific programs can help maximize your savings and make this transition more affordable.
- Net Metering: This advantageous arrangement permits homeowners to sell surplus power produced by their photovoltaic systems back to the grid, further reducing electricity expenses. It’s common to feel overwhelmed by utility costs, but in California, net metering regulations have been crucial in encouraging the use of renewable power, allowing homeowners to effectively lower their utility expenses.
- Long-Term Savings: On average, homeowners can anticipate saving around $1,500 each year with photovoltaic systems, which can lower utility costs by 20-50%. Assessing these long-term savings is essential for figuring out the return on investment for your energy system, as most systems usually cover their costs within 6-8 years.
By utilizing these incentives and understanding the financial impacts, together we can make informed choices about switching to renewable energy. Let’s work towards a more sustainable and financially sound future.
Material Quality: Choosing Durable Components for Your Solar Kit
When considering components for your , we understand that prioritizing quality is essential for optimal performance and longevity. By choosing the right materials, you can significantly reduce your energy bills and contribute to a more sustainable future. Here are some key components to consider:
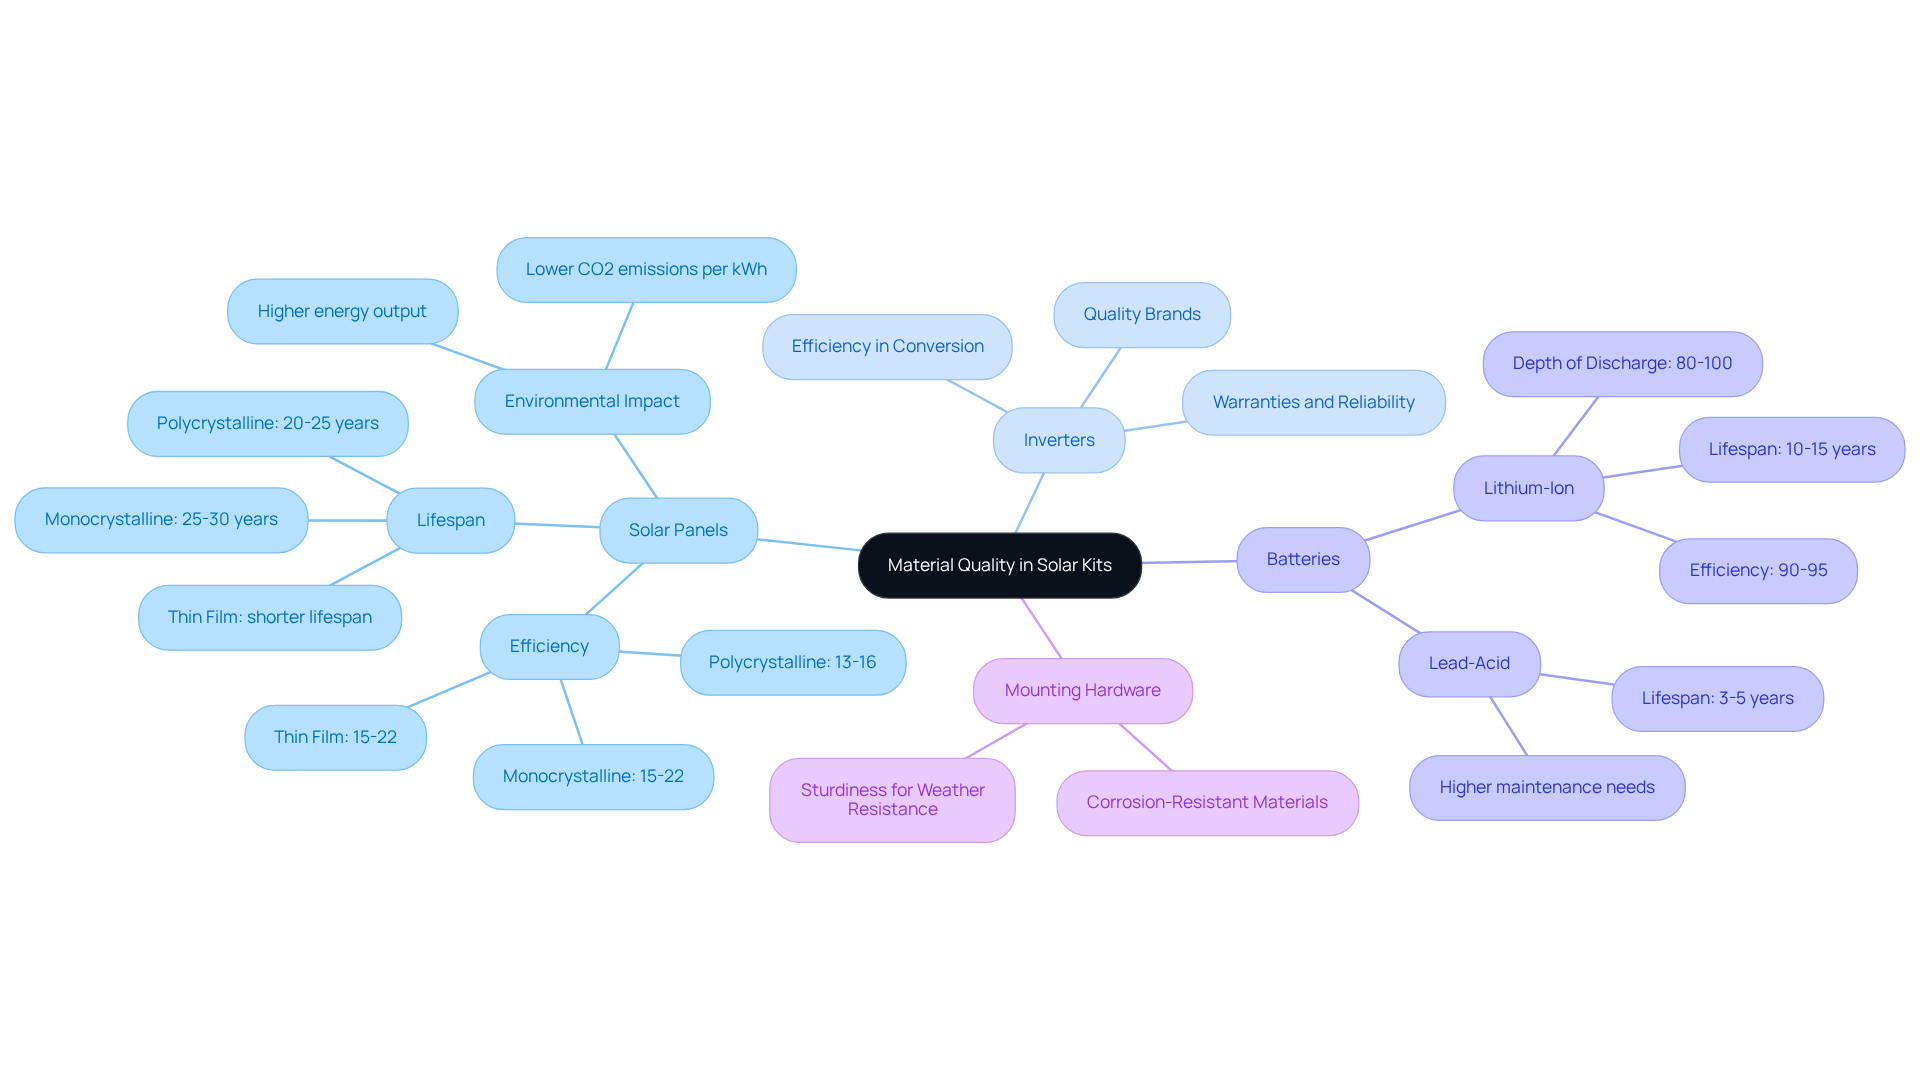
- Solar Panels: Opt for high-efficiency materials like monocrystalline silicon, which typically offer an efficiency range of 15-22% and a lifespan warranty of 25-30 years. These modules not only produce more electricity throughout their lifespan but also have a reduced environmental impact per kWh generated compared to other types. Imagine the peace of mind knowing that your investment will serve you well for decades.
- Inverters: Choose reputable brands that provide warranties and have a track record of reliability. A quality inverter is essential for converting the DC electricity produced by photovoltaic panels into usable AC power. This choice ensures that your system operates smoothly and efficiently, allowing you to enjoy the benefits of solar energy without worry.
- Batteries: Lithium-ion batteries are recommended for their superior longevity and efficiency, lasting 10-15 years or more, compared to lead-acid batteries, which typically last only 3-5 years. This longevity translates to fewer replacements and lower long-term costs. Think about how much easier your life will be with fewer interruptions and maintenance concerns.
- Mounting Hardware: Ensure that the mounting arrangement is constructed from corrosion-resistant materials to withstand harsh weather conditions. Sturdy mounting equipment is essential for preserving the integrity of your energy installation over time, allowing you to enjoy the benefits of your solar system for years to come.
Investing in high-quality components for a solar system DIY kit not only enhances the overall performance of your energy system but also extends its lifespan, ensuring a reliable and efficient energy solution for your home. Together, we can work towards a more sustainable future, making your home a beacon of energy independence and environmental responsibility.
Installation Guidance: Step-by-Step Support for Your DIY Solar Kit
Are you feeling overwhelmed by rising energy bills? You’re not alone. Many homeowners share this concern, and it’s completely understandable. By considering a solar system DIY kit for installation, you can take a significant step towards achieving energy independence and sustainability. Here are some essential steps to guide you through the process, ensuring a reliable power source for your home.
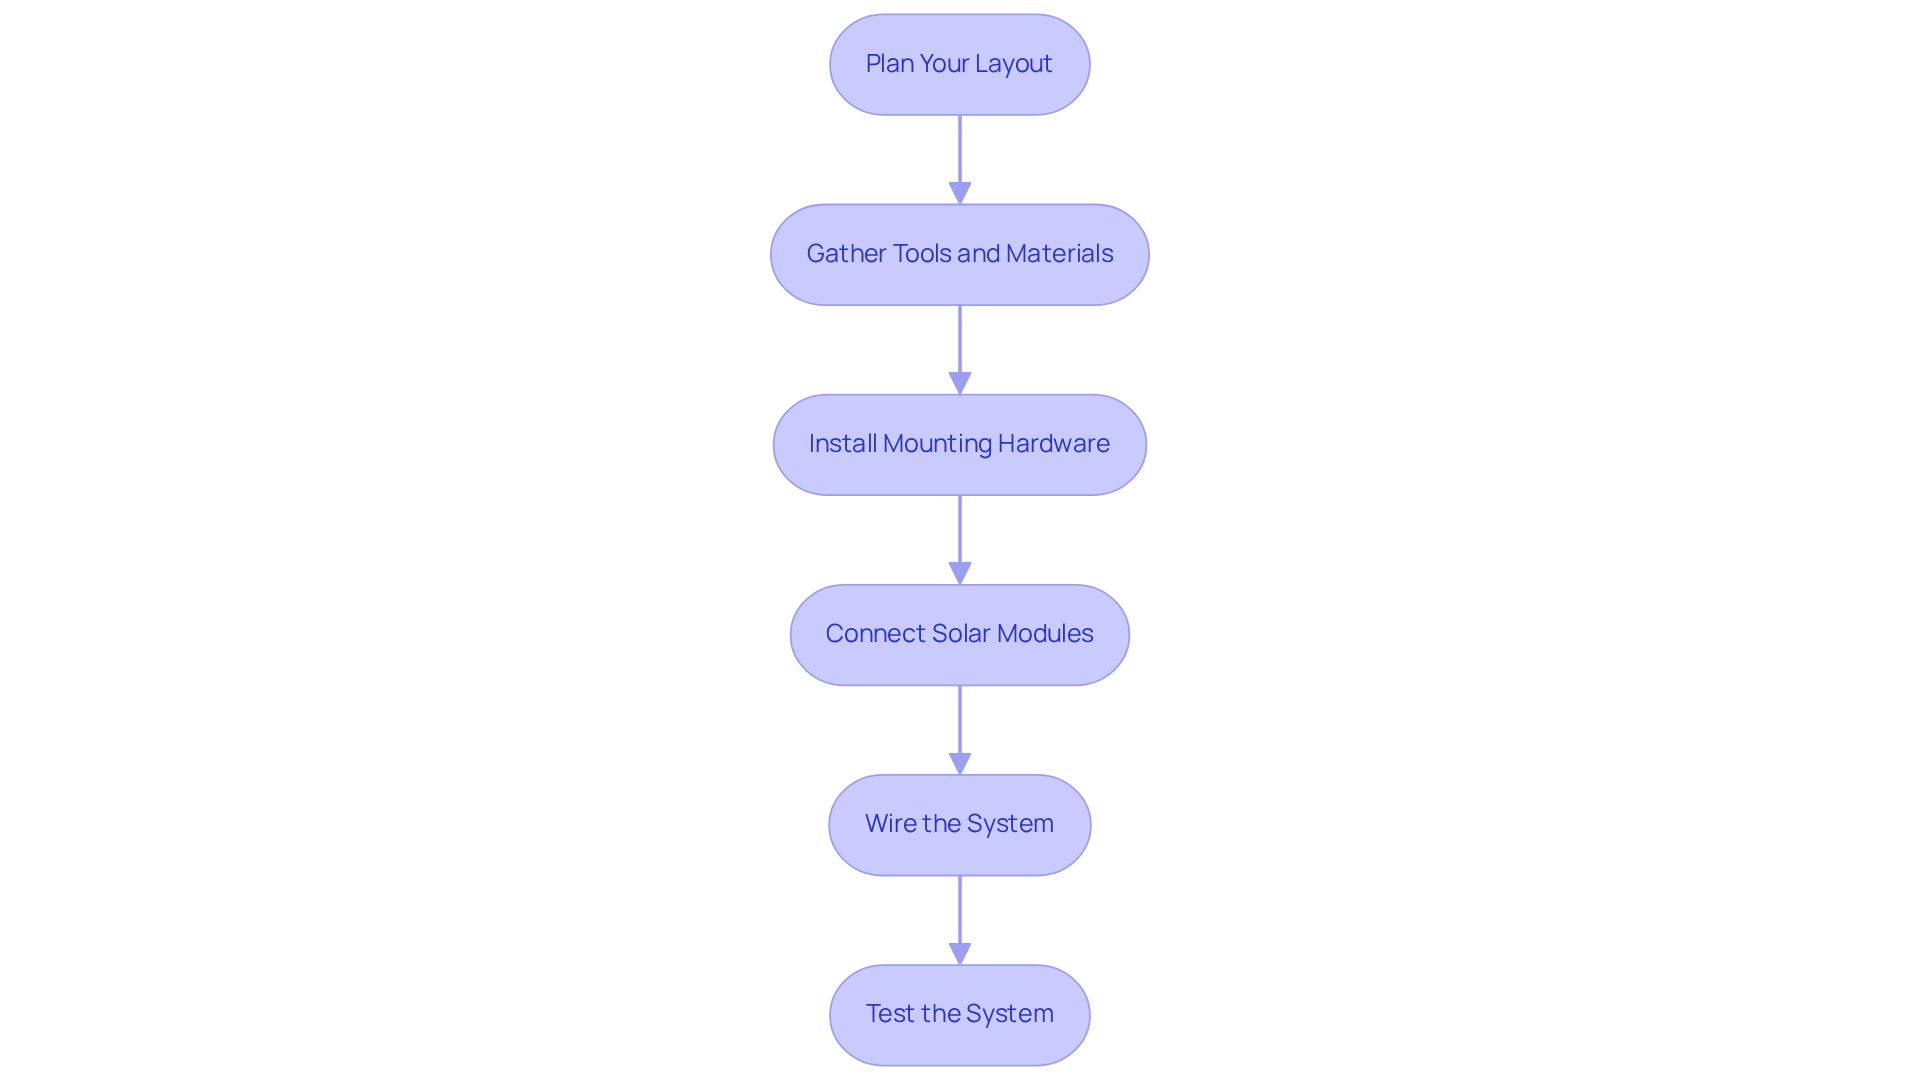
- Plan Your Layout: Start by identifying the optimal location for your photovoltaic panels. Think about factors like sunlight exposure and roof orientation. This planning phase is crucial; it directly impacts your . Remember, regions with increased sunlight can greatly boost energy generation, making it vital to evaluate your home’s energy requirements.
- Gather Tools and Materials: Before diving in, ensure you have all the necessary tools and components. This includes mounting hardware, photovoltaic modules, an inverter, and wiring. Having everything on hand will streamline your installation process and help you avoid unnecessary delays.
- Install Mounting Hardware: Securely attach the mounting brackets to your roof or ground. Proper installation of the mounting equipment is essential for the stability and durability of your energy collection system. A well-set-up network can endure 20 to 30 years, sustaining approximately 80% efficiency after 25 years.
- Connect Solar Modules: Carefully adhere to the manufacturer’s guidelines to link the solar modules to the inverter. This step is vital for ensuring your setup operates safely and effectively. While professional installers often have access to higher quality equipment, DIY installations can still be effective with the right components. It’s common to feel uncertain, but with patience, you can navigate this process.
- Wire the System: Connect the inverter to your electrical distribution board and batteries, ensuring all connections are secure. Proper wiring is essential for the functionality and safety of your setup. Did you know that using a solar system DIY kit for energy solutions can save homeowners approximately 10% on the total expense of installation compared to professional installers? Just ensure you feel comfortable with the wiring process.
- Test the System: After installation, conduct a thorough test to ensure everything operates correctly. Regularly check connections and monitor performance to maintain efficiency over time. Routine upkeep, including cleaning and performance assessment, is essential for the longevity of your energy system. Creative cleaning methods can assist in keeping your panels functioning at optimal efficiency, and evaluating the best battery options will further improve your power storage capabilities.
By following these steps, you can enhance the efficiency of your solar system DIY kit installation, ensuring a dependable and sustainable power source for your home. Together, let’s work towards a greener future. If you have any questions or need guidance, don’t hesitate to seek advice from experts or explore online resources to enrich your installation experience.
Performance Monitoring: Tools to Track Your Solar System’s Efficiency
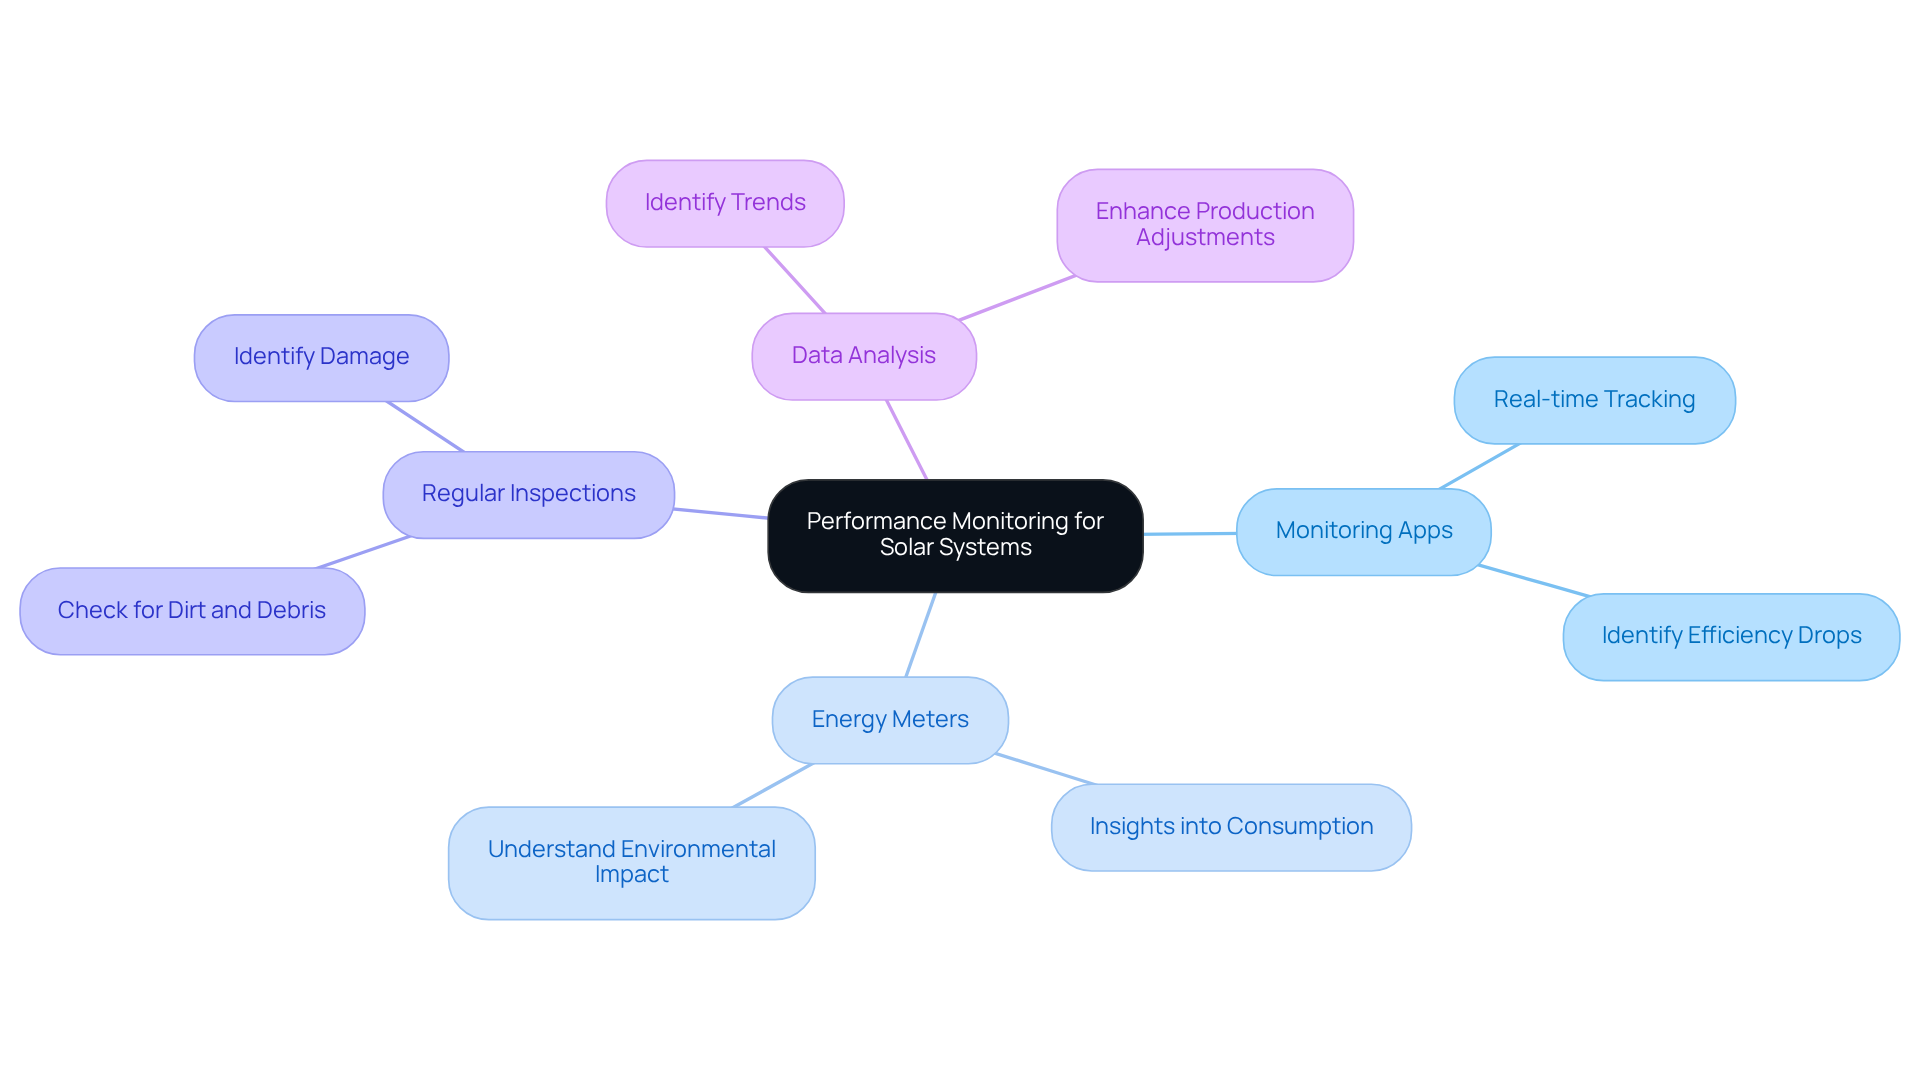
To maximize the efficiency of your solar system DIY kit, we understand that monitoring its performance is essential for your peace of mind. Consider implementing performance monitoring tools that can help you stay on top of your energy needs:
- Monitoring Apps: Many inverters come equipped with apps that allow you to track energy production and system performance in real-time. This feature can help you quickly identify any drops in efficiency, often due to dirt or debris accumulation on your panels. Specialists point out that a significant decrease in power generation can often be traced back to such issues, which is why staying informed is crucial.
- Energy Meters: Installing energy meters can provide valuable insights into your household’s energy consumption and solar production. Understanding this information is vital for comprehending how your setup’s performance. Studies indicate that the median loss rate for photovoltaic system performance is 0.75% per year, emphasizing the importance of regular monitoring to mitigate these losses.
- Regular Inspections: We encourage you to periodically inspect your solar panels for dirt, debris, or damage that could affect performance. Remember, even minor performance reductions can compound over time, leading to considerable loss of vitality. Regular upkeep can help reduce these losses, ensuring your setup functions at its best.
- Data Analysis: Analyzing performance data allows you to identify trends and make adjustments to enhance production. Regular maintenance, such as cleaning your solar panels, can minimize losses and ensure that your solar system DIY kit continues to function efficiently and effectively. By monitoring your system, you can ensure it remains a reliable source of cost-effective and sustainable energy, aligning with your goal of enhancing energy independence.
Together, let’s work towards maximizing the potential of your solar system, ensuring it serves you well for years to come.
Conclusion
Investing in a solar system DIY kit offers a wonderful opportunity for homeowners to take control of their energy consumption and contribute to a sustainable future. We understand that energy bills can be a significant concern, and by grasping the essential components, assessing your energy needs, ensuring system compatibility, and navigating local regulations, you can effectively harness the power of solar energy. This journey not only leads to reduced energy bills but also nurtures a sense of independence and environmental responsibility.
Throughout this article, we’ve highlighted key insights, such as:
- The importance of selecting high-quality components
- Understanding financial incentives
- Implementing effective installation practices
Additionally, the significance of performance monitoring tools ensures that your solar system continues to operate at optimal efficiency, maximizing your investment over time. Each step you take towards installing a solar system DIY kit is a step towards a greener home and a more sustainable lifestyle.
In conclusion, as the demand for renewable energy solutions grows, embracing a solar system DIY kit can be a transformative experience. It’s common to feel overwhelmed by the complexities of solar installations, but by prioritizing education and support, you can navigate this journey with confidence. Now is the time to explore the benefits of solar energy and take action towards achieving energy independence. Together, with the right tools, knowledge, and commitment, a brighter, more sustainable future is within reach.
