Introduction
Considering the shift towards sustainable energy solutions, many homeowners are exploring the potential of solar panels, particularly when it comes to integrating them with clay tile roofs. While the idea of harnessing the sun’s energy is appealing, the journey from concept to installation can seem daunting.
This guide breaks down the essential steps for successfully installing solar panels on clay tile roofs, including:
- Assessing the roof’s condition
- Choosing the right mounting systems
- Ensuring everything is properly wired
With expert insights and practical tips, homeowners can navigate the process with confidence, making informed decisions that not only enhance their property’s efficiency but also contribute to a greener future.
Whether it’s understanding the nuances of roof preparation or exploring innovative solar technologies, this article aims to empower homeowners to embrace solar energy as a viable and sustainable option.
Step 1: Assessing Your Clay Tile Roof for Solar Panel Installation
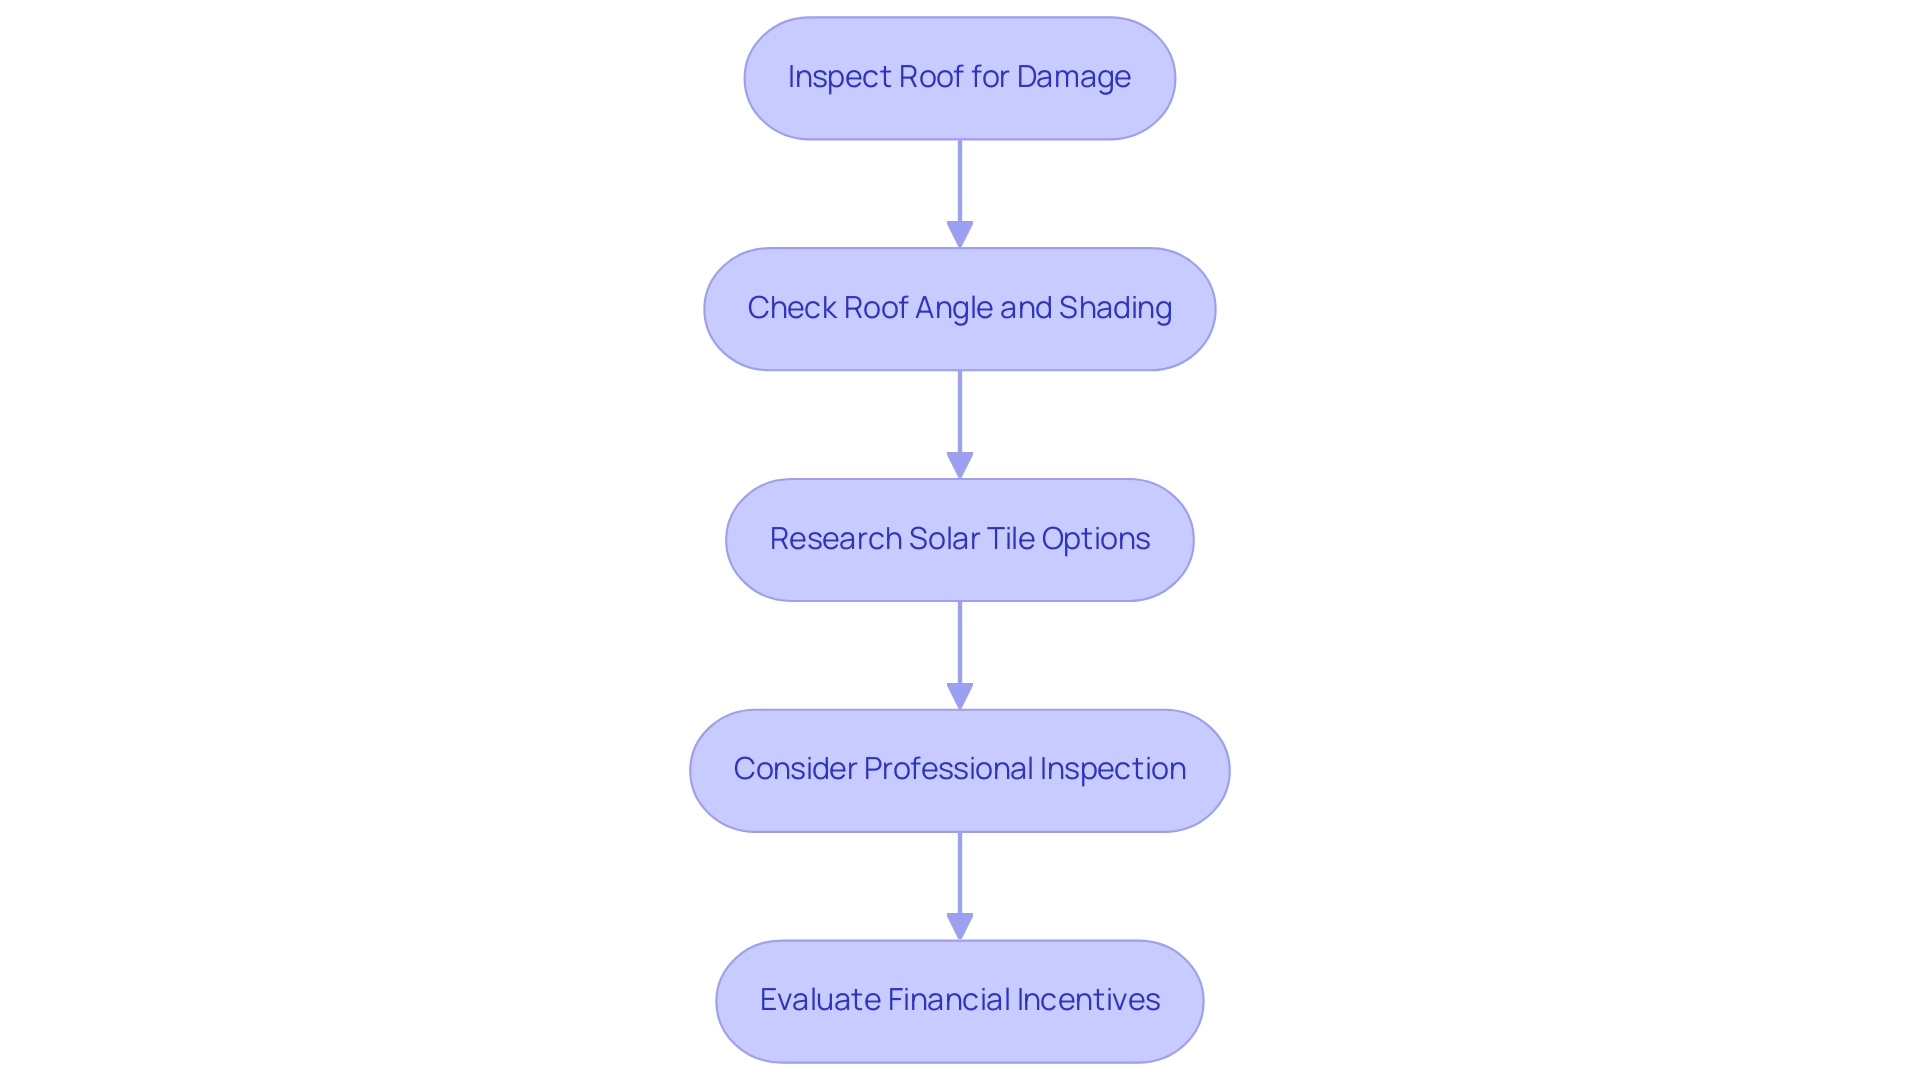
Start by taking a good look at your clay tile covering to spot any signs of damage—this includes cracked or missing tiles that could compromise its integrity. It’s essential to ensure that the covering structure is in good shape and free from leaks. Furthermore, consider the angle and shading of your structure; ideally, a south-facing surface with minimal shade will optimize your panel’s efficiency.
According to Solecco, a Leeds-based producer of photovoltaic tiles, their products are designed to blend seamlessly with various roof types, making them an attractive option for homeowners. However, investing in Solecco tiles can be significant, with prices starting at over £12,000 before labor costs. Homeowners may also explore government programs that provide financial incentives and support for renewable energy investments, which can help offset installation costs.
If you’re feeling uncertain about your home’s condition, it’s wise to bring in a professional for a detailed inspection. This step is essential to guarantee that your structure can bear the weight of the panels and enable a successful installation. Regular maintenance is essential to enjoying the advantages of renewable energy, including efficiency and longevity.
Case studies on brands like Tesla’s Solar Glass Roof and GB-Sol demonstrate the unique features and market positions of these tiles, providing valuable insights into the advantages and challenges of installing solar panels on clay tile roofs. Furthermore, evaluating battery alternatives for energy storage can further improve the effectiveness of your photovoltaic setup. Embrace the journey towards sustainable living by considering these factors for your energy investment, and don’t forget the importance of routine cleaning services to maintain optimal performance!
Step 2: Choosing the Right Mounting System for Clay Tiles
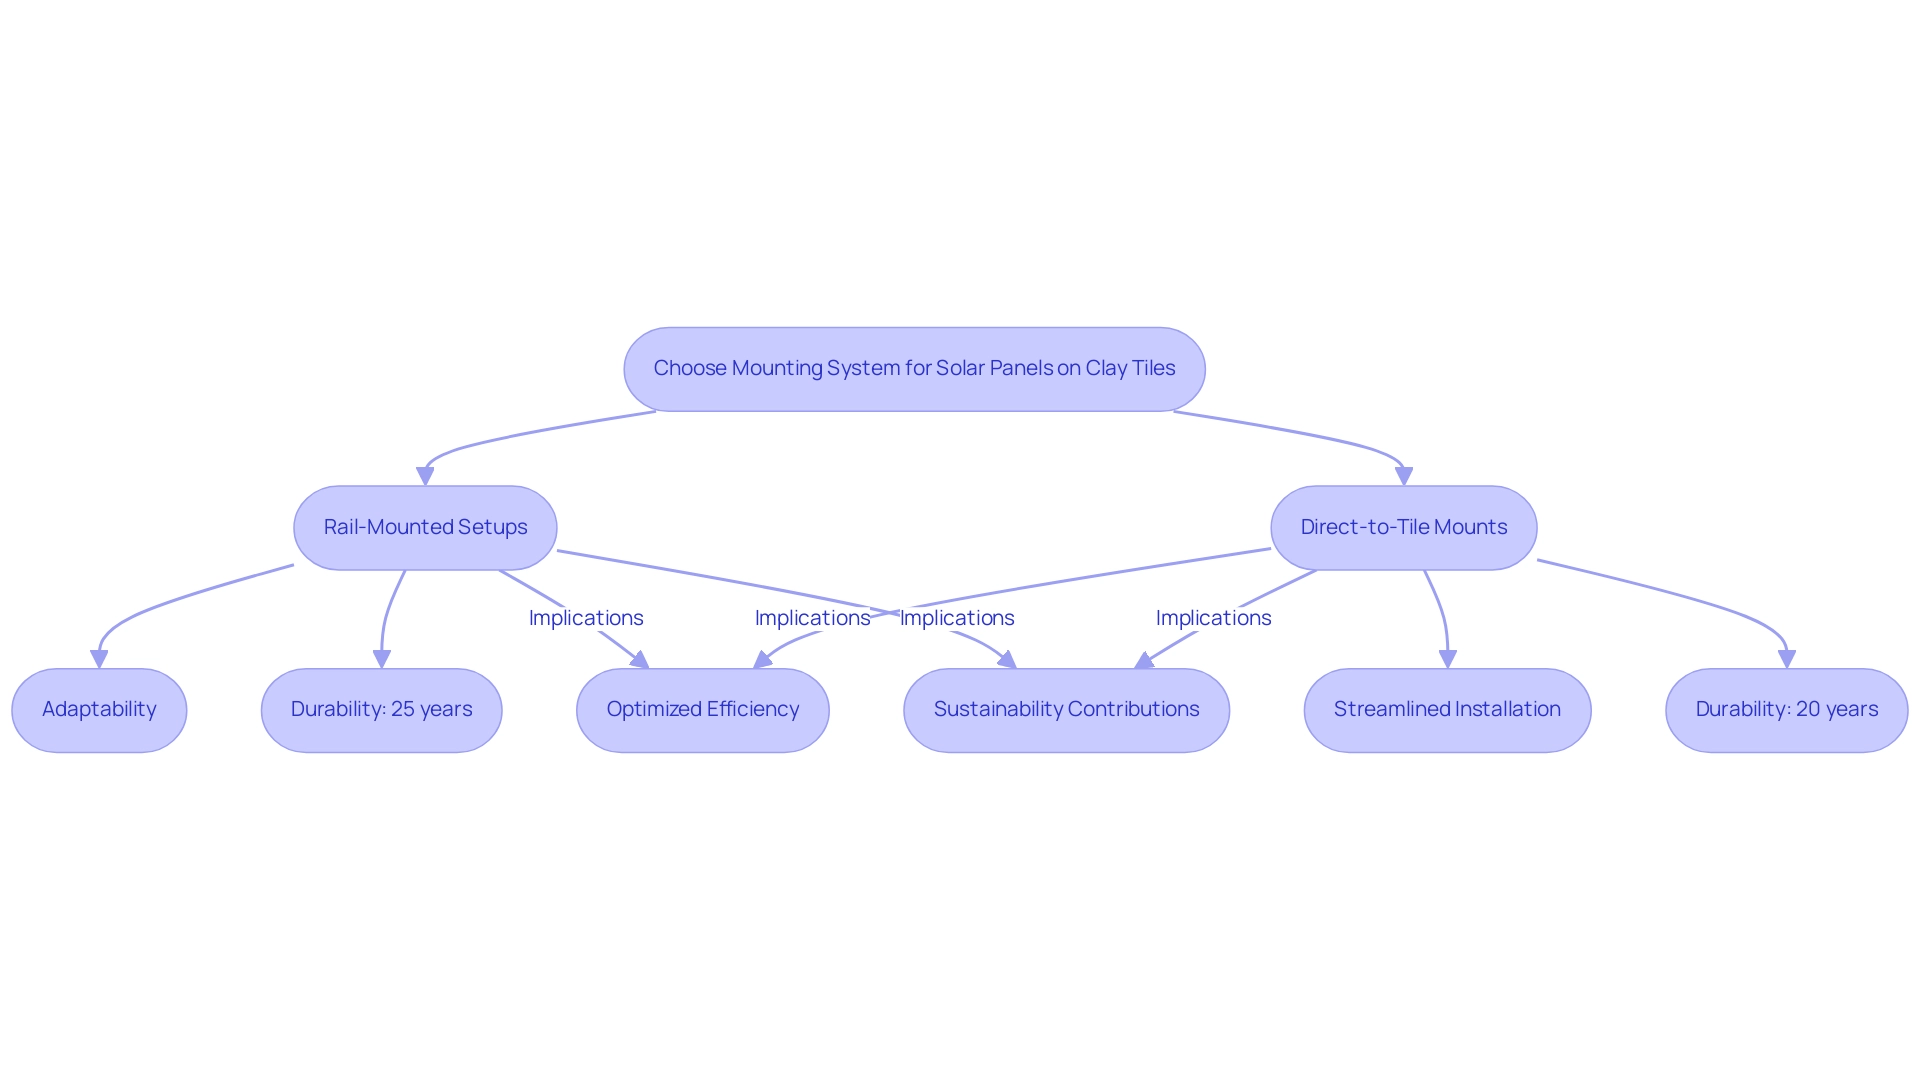
When choosing a mounting solution for your solar panels on clay tile roof installations, you’ll discover two main choices: rail-mounted setups and direct-to-tile mounts, both designed specifically for clay tiles. Rail-mounted setups provide the benefit of adaptability in arrangement, enabling you to discover the ideal configuration for your roof’s distinct shape and orientation. On the other hand, direct-to-tile mounts streamline the installation process, making it faster and often more cost-effective.
Recent studies indicate that rail-mounted setups can provide a durability rating of up to 25 years, while direct-to-tile mounts typically last around 20 years, making both alternatives robust under various weather conditions. Selecting the appropriate mounting solution optimizes your photovoltaic efficiency and leads to significant energy savings, boosting your energy autonomy while encouraging sustainability. It’s essential to ensure that whichever mounting method you choose is compatible with your specific tile type and is robust enough to withstand local weather conditions.
As stated by James Elston, a seasoned expert at Eco Happy, ‘If you’re curious about how to install energy collectors on a tiled surface, this guide simplifies it into straightforward, practical steps.’ For instance, a case study from Eco Happy demonstrated the successful installation of solar panels on clay tile roof rail-mounted structures in a coastal area, where the panels withstood high winds and heavy rainfall, resulting in a significant reduction in energy costs for the homeowner. Additionally, heating systems, whether active or passive, play a crucial role in reducing greenhouse gas emissions and can create jobs in the renewable energy sector.
As you explore your options, don’t forget to research brands renowned for their quality and durability, as this choice significantly influences the efficiency and stability of your energy installation. Moreover, if rooftop setups aren’t practical, community energy programs present a great option for renters or individuals not prepared for energy systems on their buildings, enabling involvement in local energy farms and reaping benefits from renewable energy without the necessity for direct installation. With the appropriate mounting setup in place, you’re not just installing photovoltaic modules; you’re making a significant contribution to reducing greenhouse gas emissions and embracing a cleaner, more sustainable future for your home and community.
Step 3: Preparing the Installation Area for Solar Panels
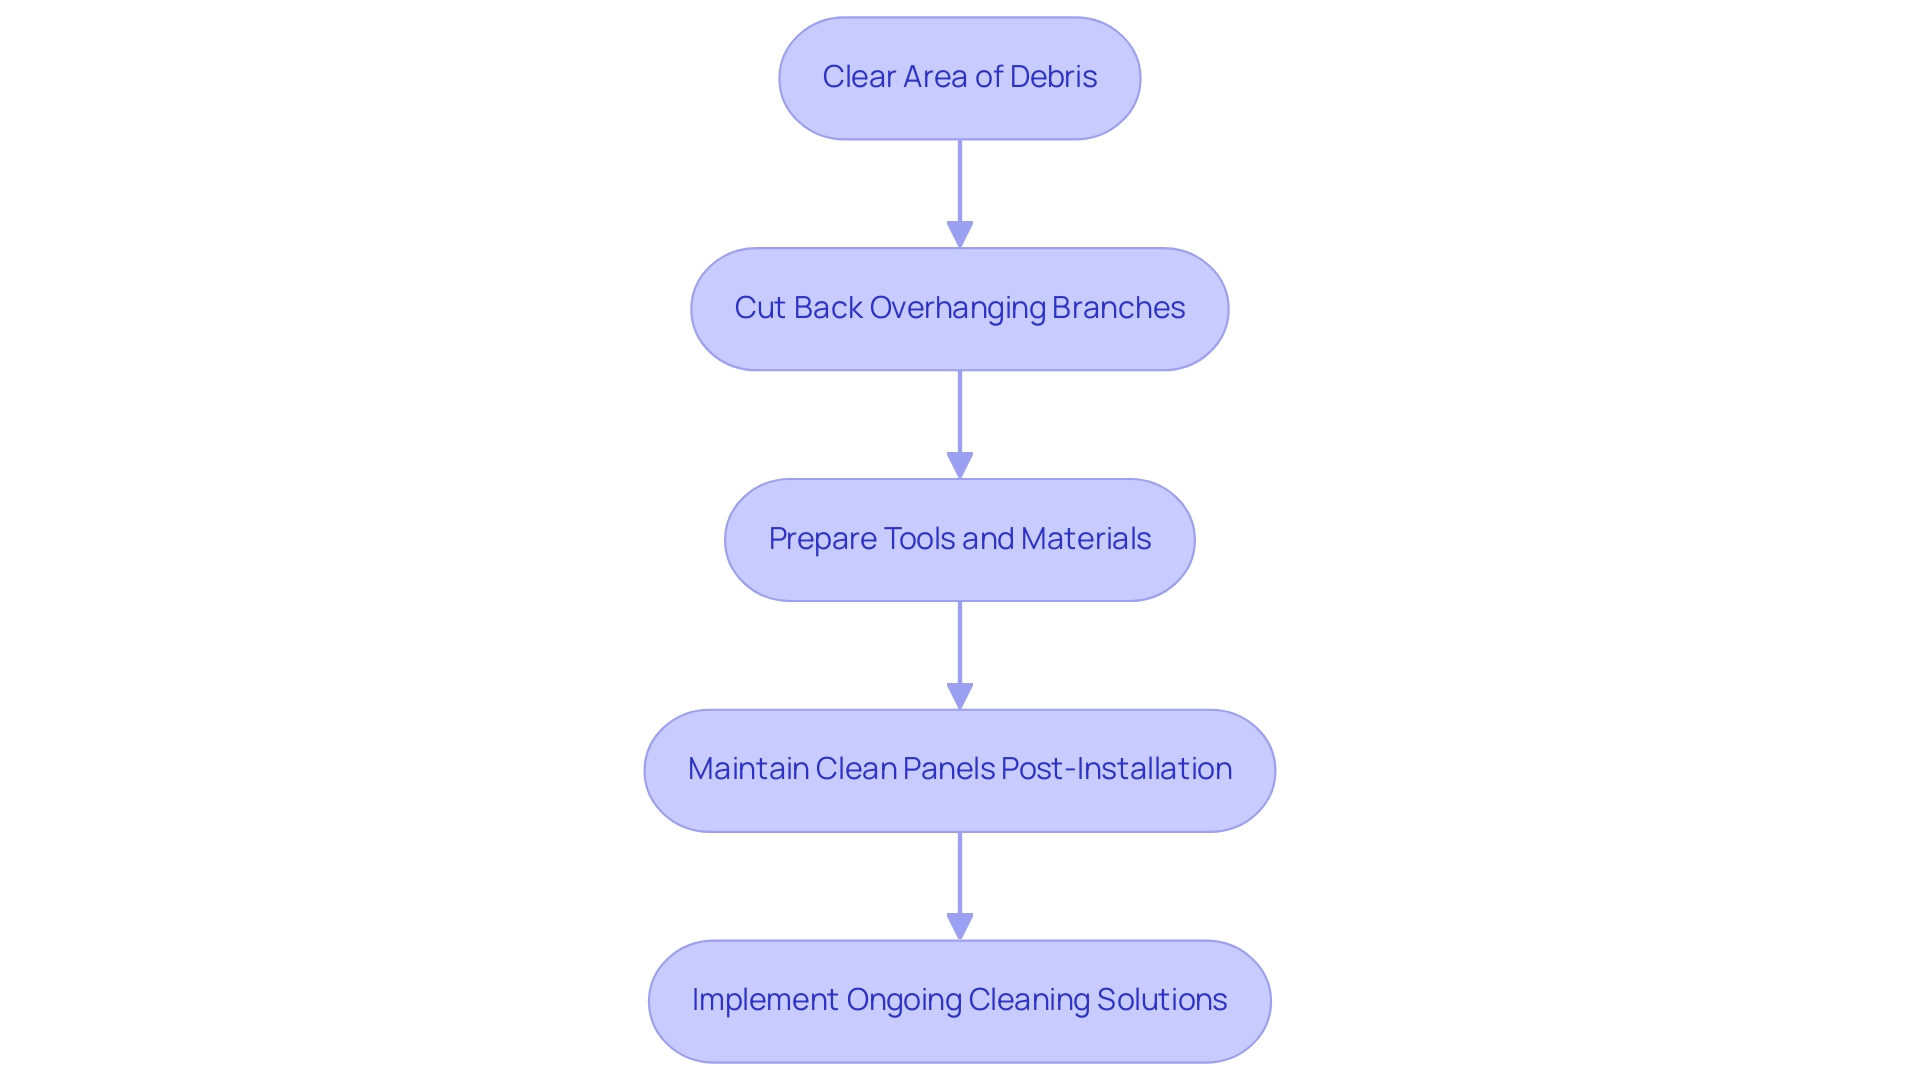
Getting ready for the installation of photovoltaic modules is a crucial phase that can greatly influence the efficiency and performance of your new setup. Before the installation team arrives, take the time to clear the area around your roof. This means removing any debris that has accumulated—think leaves, twigs, or dirt—that could hinder the installation process.
Overhanging branches are another factor; cutting them back not only creates an unobstructed pathway but also enhances sunlight exposure for your energy collectors.
Ensure you have all the essential tools and materials prepared, including your mounting apparatus, energy collectors, and wiring. Being organized helps streamline the installation process, reducing potential delays and ensuring everything runs smoothly. It’s also essential to remember that maintaining clean panels post-installation is crucial; studies show that failing to address dust accumulation can lead to a substantial revenue loss—up to 25%—due to a reduction in radiation of around 20%.
Furthermore, data indicates that the median loss rate for photovoltaic installations is 0.75% per year, with 90% of installations experiencing less than a 2% loss each year. Routine cleaning can mitigate these performance losses and enhance energy production, supporting your goal of a more sustainable home. As one expert noted, “Did you notice a significant drop in energy production?
This issue can arise from several factors, with the most frequent being dust and debris accumulation. By adhering to these best practices for preparation, you’re not only ensuring a successful installation; you’re also establishing a foundation for an energy system that operates efficiently and effectively for years ahead. Embrace the benefits of maintaining your energy collectors clean with innovative solutions like automated cleaning robots, self-cleaning coatings, or professional cleaning services to ensure your investment is performing at its best.
Step 4: Installing the Solar Panels on Your Clay Tile Roof
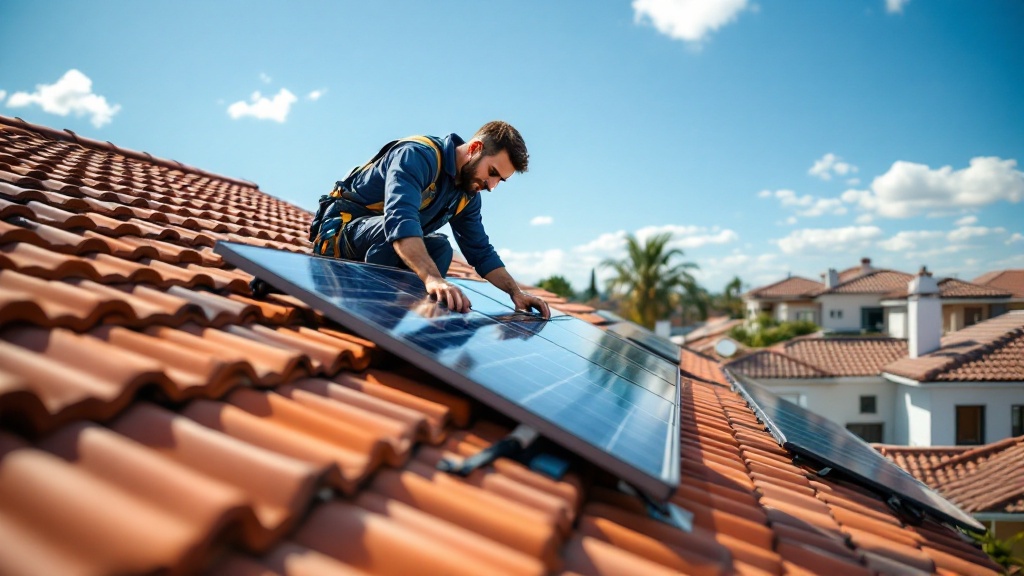
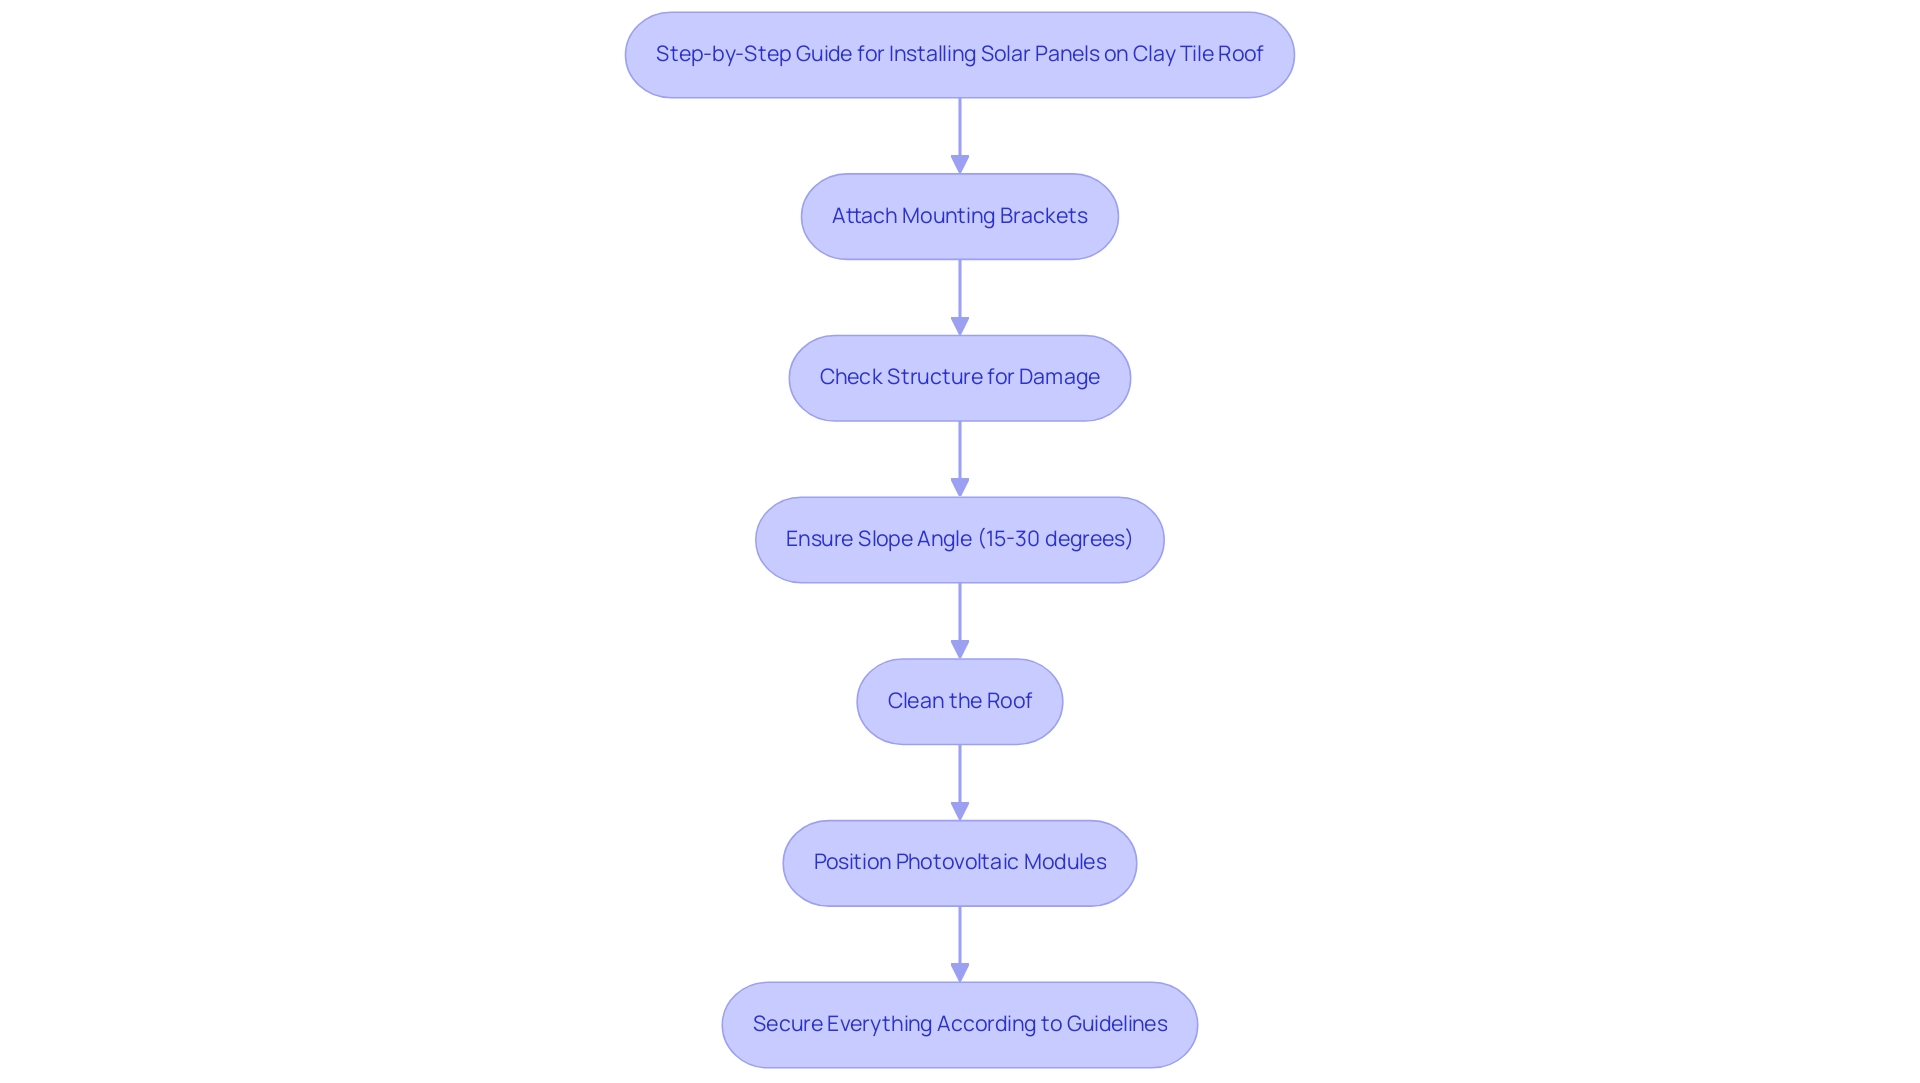
When you’re prepared to set up those energy collectors, the initial step is to attach the mounting brackets to the top structure. This is crucial, so make sure the solar panels on clay tile roof are anchored properly to the rafters beneath the tiles. Following the manufacturer’s instructions for spacing and alignment will set you up for success.
Keep in mind, a slope angle of 15-30 degrees is deemed ideal for panel setup, so ensure your structure meets this specification. Before you start, it’s crucial to prepare your structure:
- Clean it thoroughly
- Check for any damage
- Consider potential shading issues that may affect performance
A properly cared-for roof not only improves the visual charm of your home but also maximizes the effectiveness of your energy setup.
Once your brackets are in place, position the photovoltaic modules carefully onto them. Remember to secure everything according to the guidelines to keep everything safe and sound. A gentle touch is key here—be cautious not to damage those beautiful clay tiles when installing solar panels on clay tile roof.
As G Store, a licensed and reputable energy retailer and installer, advises, “You can make sure you’re getting the very best information by reading through the other articles on our Learning Center.” Don’t forget to use a level to ensure that your devices are perfectly aligned; this little tip can really help maximize your system’s efficiency. Furthermore, grasping how photovoltaic systems transform sunlight into electricity can enhance your appreciation of their advantages even more. Government programs for photovoltaic systems can offer financial incentives, making installation more affordable.
When choosing your photovoltaic inverter, consider factors such as efficiency ratings and compatibility with your energy system. By taking these steps, you can ensure a smooth installation and get that renewable energy flowing in no time!
Step 5: Connecting Wiring and Testing Your Solar Panel System
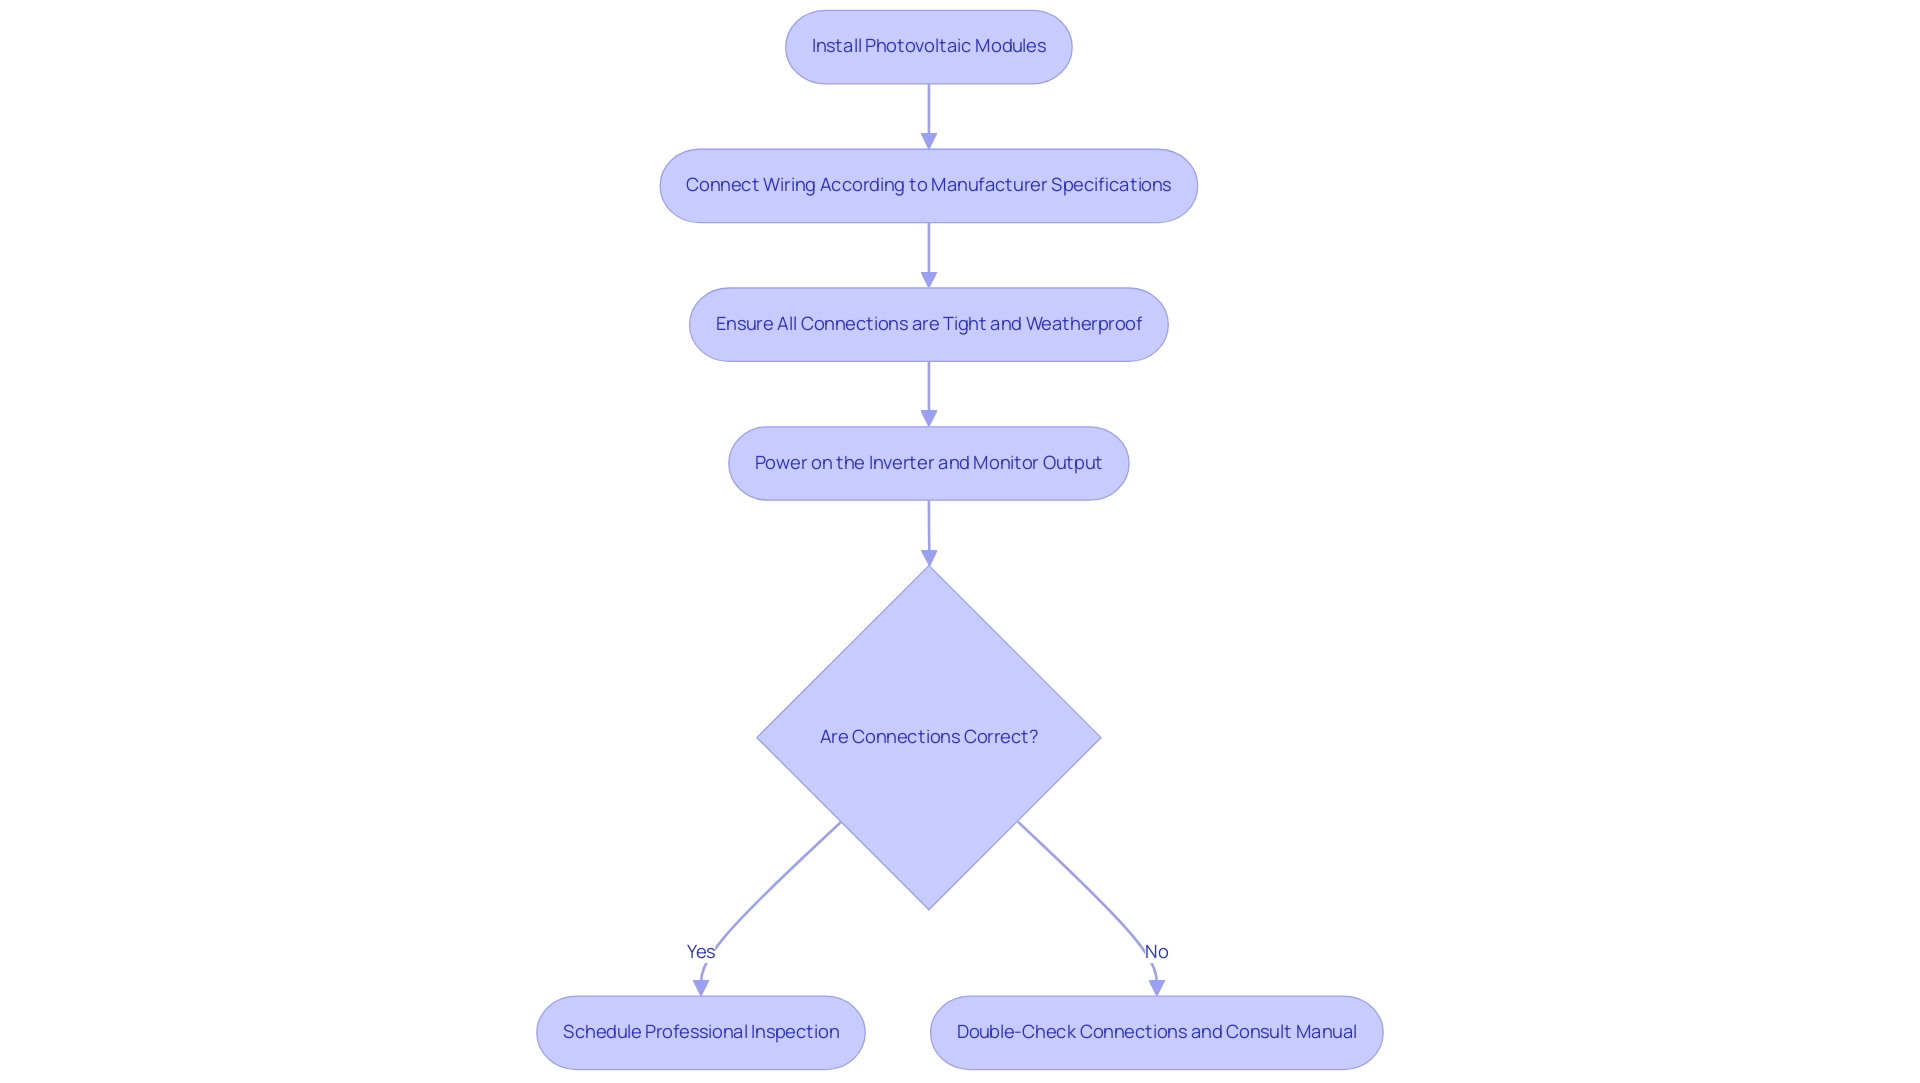
Once you’ve securely installed your photovoltaic modules, the next step is to connect the wiring according to the manufacturer’s specifications. It’s crucial to ensure that all connections are tight and weatherproof; this helps to prevent any potential electrical issues down the line. As you finish the wiring, remember to follow wiring standards for photovoltaic installations to ensure safety and efficiency.
After wiring, it’s time to power on the inverter and monitor the output. If you notice any discrepancies, it’s wise to double-check your connections and consult the installation manual for guidance. Remember, as Fenice Energy highlights, a PWM charge controller effectively manages voltage and current from photovoltaic modules to avoid battery overcharging, which is crucial for preserving overall health.
Furthermore, consider the advantages of different battery types:
- Lead-acid batteries are economical but have a shorter lifespan.
- Lithium-ion batteries provide greater efficiency and durability.
- Flow batteries offer scalability for larger setups.
Each type has its own economic advantages that can enhance your energy independence. To further ensure your setup is performing optimally, consider scheduling a professional inspection.
This step can provide peace of mind, confirming that everything is installed safely and effectively. Lastly, stay informed about the latest updates on testing photovoltaic systems after installation, as recent news highlights that a battery cell voltage mismatch exceeding 2% can indicate accelerated aging or a short life expectancy, underscoring the importance of thorough testing. Furthermore, a case study titled ‘Troubleshooting Common Series Connection Issues’ illustrates the necessity of inspecting each panel for damage and connection problems, as a malfunctioning panel can reduce the output of the entire string.
By understanding these key considerations and the latest advancements in renewable technology, you can make informed decisions that enhance your home’s sustainability and energy efficiency. Prepared to enhance your investment in renewable energy? Contact Powercore Electric today to explore our innovative solar battery solutions and discover how you can enhance your energy independence!
Conclusion
Investing in solar panels for clay tile roofs is a significant step towards embracing sustainable energy solutions. As outlined in this guide, the journey begins with a thorough assessment of your roof’s condition, ensuring it’s ready to support the weight and installation of solar panels. Choosing the right mounting system—whether rail-mounted or direct-to-tile—can optimize the efficiency of your solar setup and enhance your energy independence.
Preparation is key, and clearing the installation area not only facilitates a smoother process but also maximizes the performance of your solar panels. Once installed, proper wiring and regular maintenance will ensure your system operates efficiently for years to come. With the right tools and knowledge, homeowners can confidently navigate the installation process and make informed choices that contribute to a greener future.
Ultimately, integrating solar panels with clay tile roofs is not just about harnessing solar energy; it’s about taking a proactive stance toward sustainability. Each step taken—from assessing the roof to connecting the wiring—brings homeowners closer to a cleaner, more efficient energy solution. By following these guidelines, homeowners can enjoy the numerous benefits of solar energy while playing a part in reducing their carbon footprint. Embrace the transition to solar power and join the movement toward a more sustainable lifestyle.
